• Skip to main content
  • Skip to primary sidebar
  • Skip to footer
Equalize Digital Home

Equalize Digital

Website Accessibility Consulting, Training, and Development

  • My Account
  • Swag Shop
  • Checkout
  • Services
    • Accessibility Audits
    • User Testing
    • Accessibility Remediation
    • VPAT & ACR Preparation
    • Accessibility Monitoring
    • Web Accessibility Training
    • Accessibility for Agencies
  • Accessibility Checker
    • Overview
    • Features
    • Pricing
    • Documentation
    • Support
    • Buy Now
  • Company
    • About Us
    • Our Team
    • Industry Expertise
    • Accessibility Statement
    • Contact Sales
    • Become An Affiliate
  • Learn
    • Online Courses
    • Accessibility Meetup
    • Articles & Resources
    • Accessibility Craft Podcast
    • Upcoming Events
    • Office Hours
    • Custom Accessibility Training
    • Global Accessibility Awareness Day
  • Contact Sales
  • My Account
  • Checkout
Home / Accessibility Checker / Enable Skip Link

Enable Skip Link

Is your website is missing skip links? This article explains how to easily add skip to content and skip to navigation links to your WordPress site for improved accessibility.

How to Add Skip Links in WordPress

If your website is missing skip links, this can be easily fixed without writing code using the WordPress Accessibility Checker plugin.

Step 1

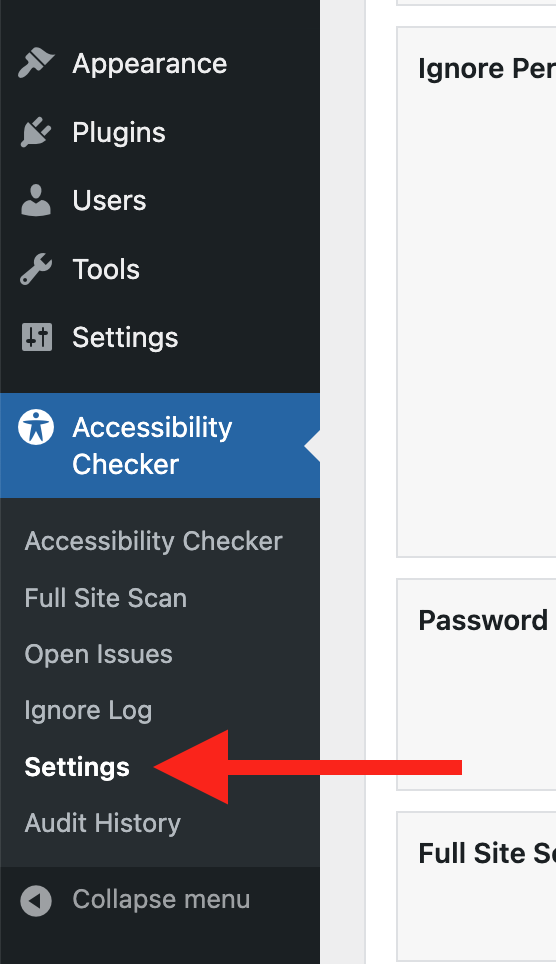
Click into the Accessibility Checker plugin settings in your WordPress dashboard (you must be logged in with an administrator account to access these settings).

Arrow pointing to the Settings page in the WordPress admin menu, which can be found under the Accessibility Checker top-level page.

Step 2

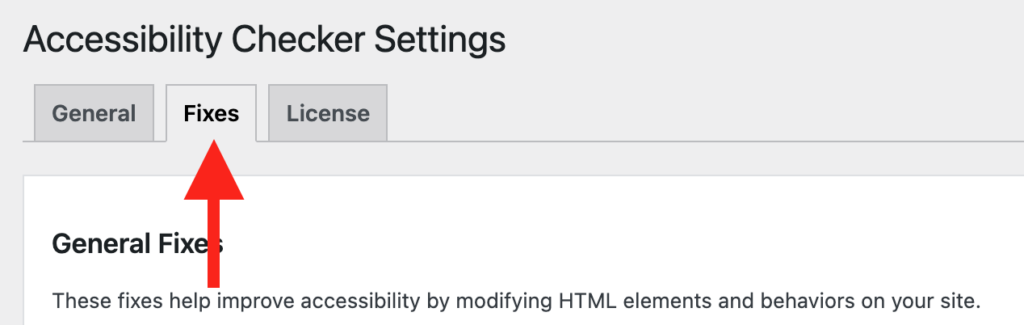
Go to the “Fixes” tab in the Settings Tabs navigation.

Arrow pointing to the Fixes page in the Settings tab navigation below the Accessibility Checker Settings H1.

Step 3

Check the box for Enable Skip Link, then configure the appropriate targets for the main content and (if desired) the navigation.

Skip link Accessibility Checker settings as described following the image.

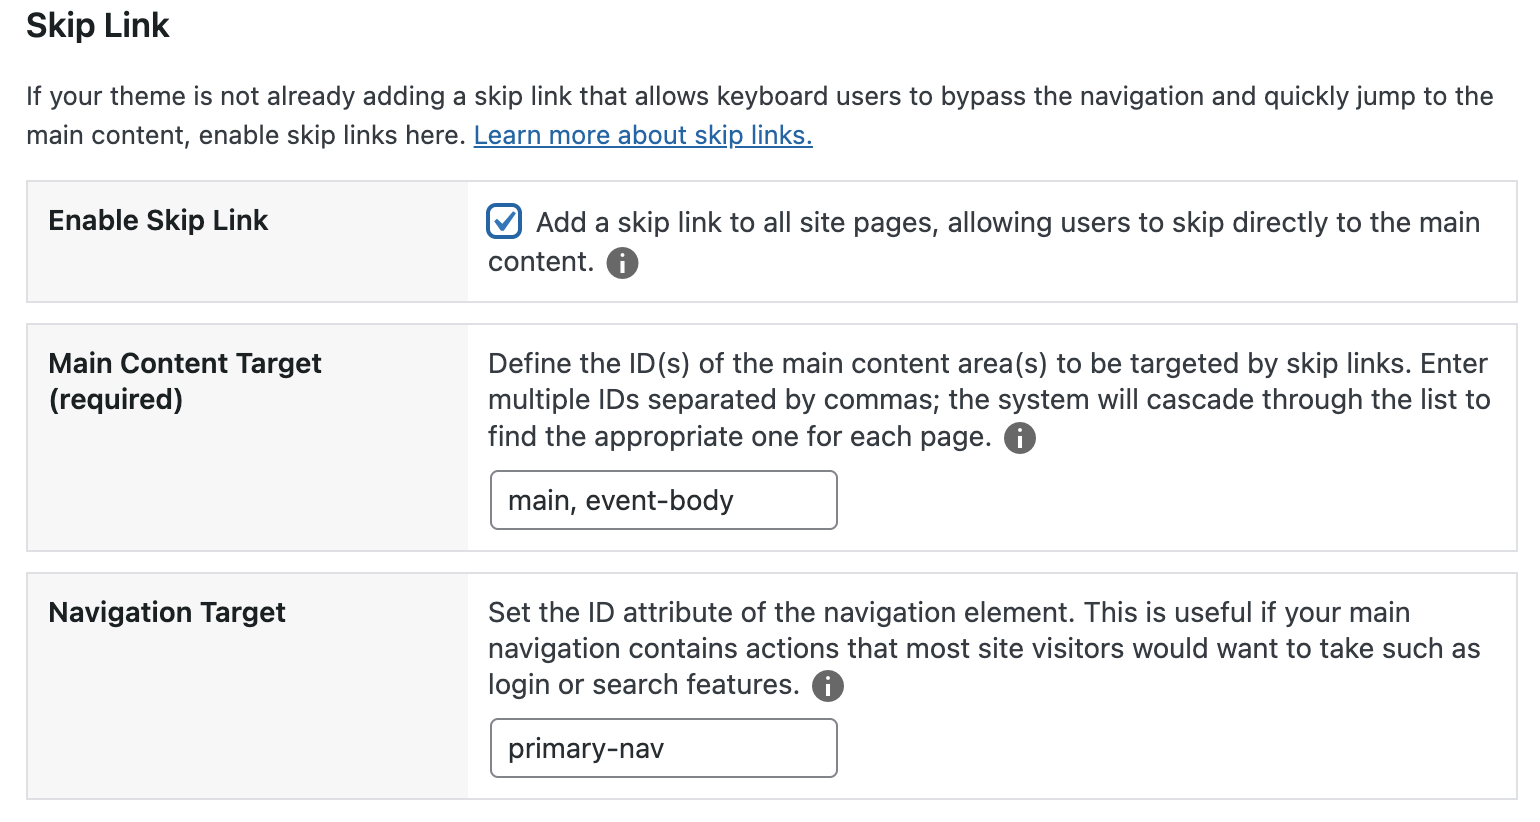
After checking the box labeled “Add a skip link to all site pages, allowing users to skip directly to the main content”, two additional settings will appear. A field for defining the main content targets and a field for navigation target.

Step 4

Fill in the fields for the main content and (if desired) the navigation target.

Main content target

This field is required for your skip-to-content link to work. You can enter multiple IDs separated by commas; the system will cascade through the list to find the appropriate one for each page. This is helpful if you have different IDs for the main content on different post types.

Navigation target

If you fill this field in, Accessibility Checker will also add a skip to navigation link after the skip to content link on your site. This is useful if your main navigation contains actions that most site visitors would want to take, such as login or search features, or if your header has many elements before the main navigation.

Only enter one ID in this field.

How to find the ID for your targets

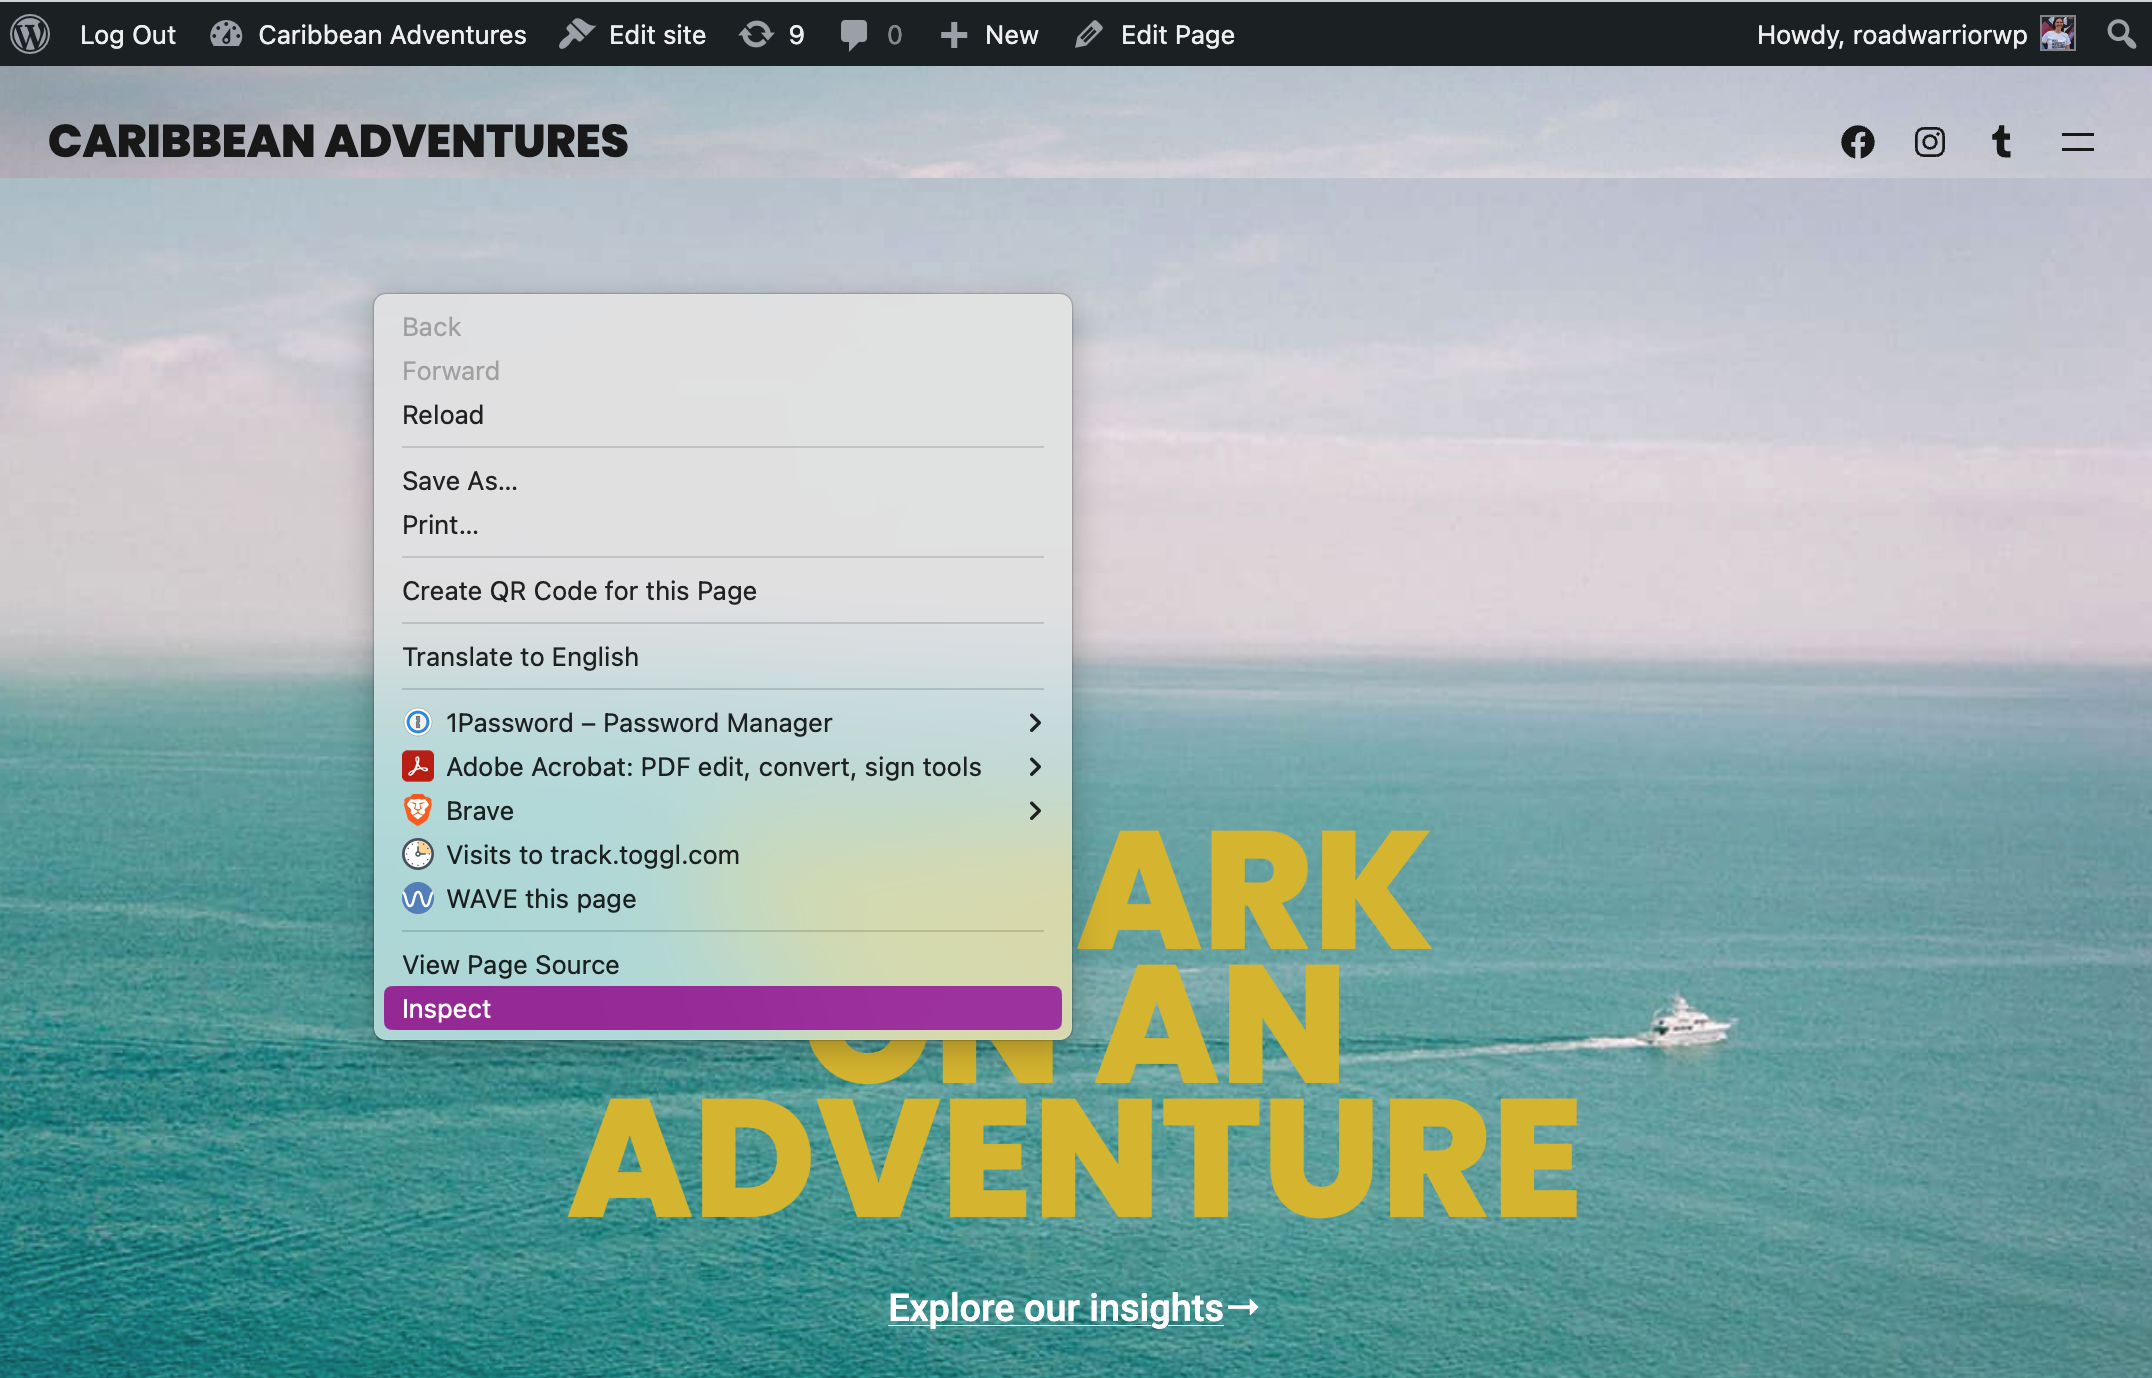
Here is how you can find the ID for your main content and navigation targets.

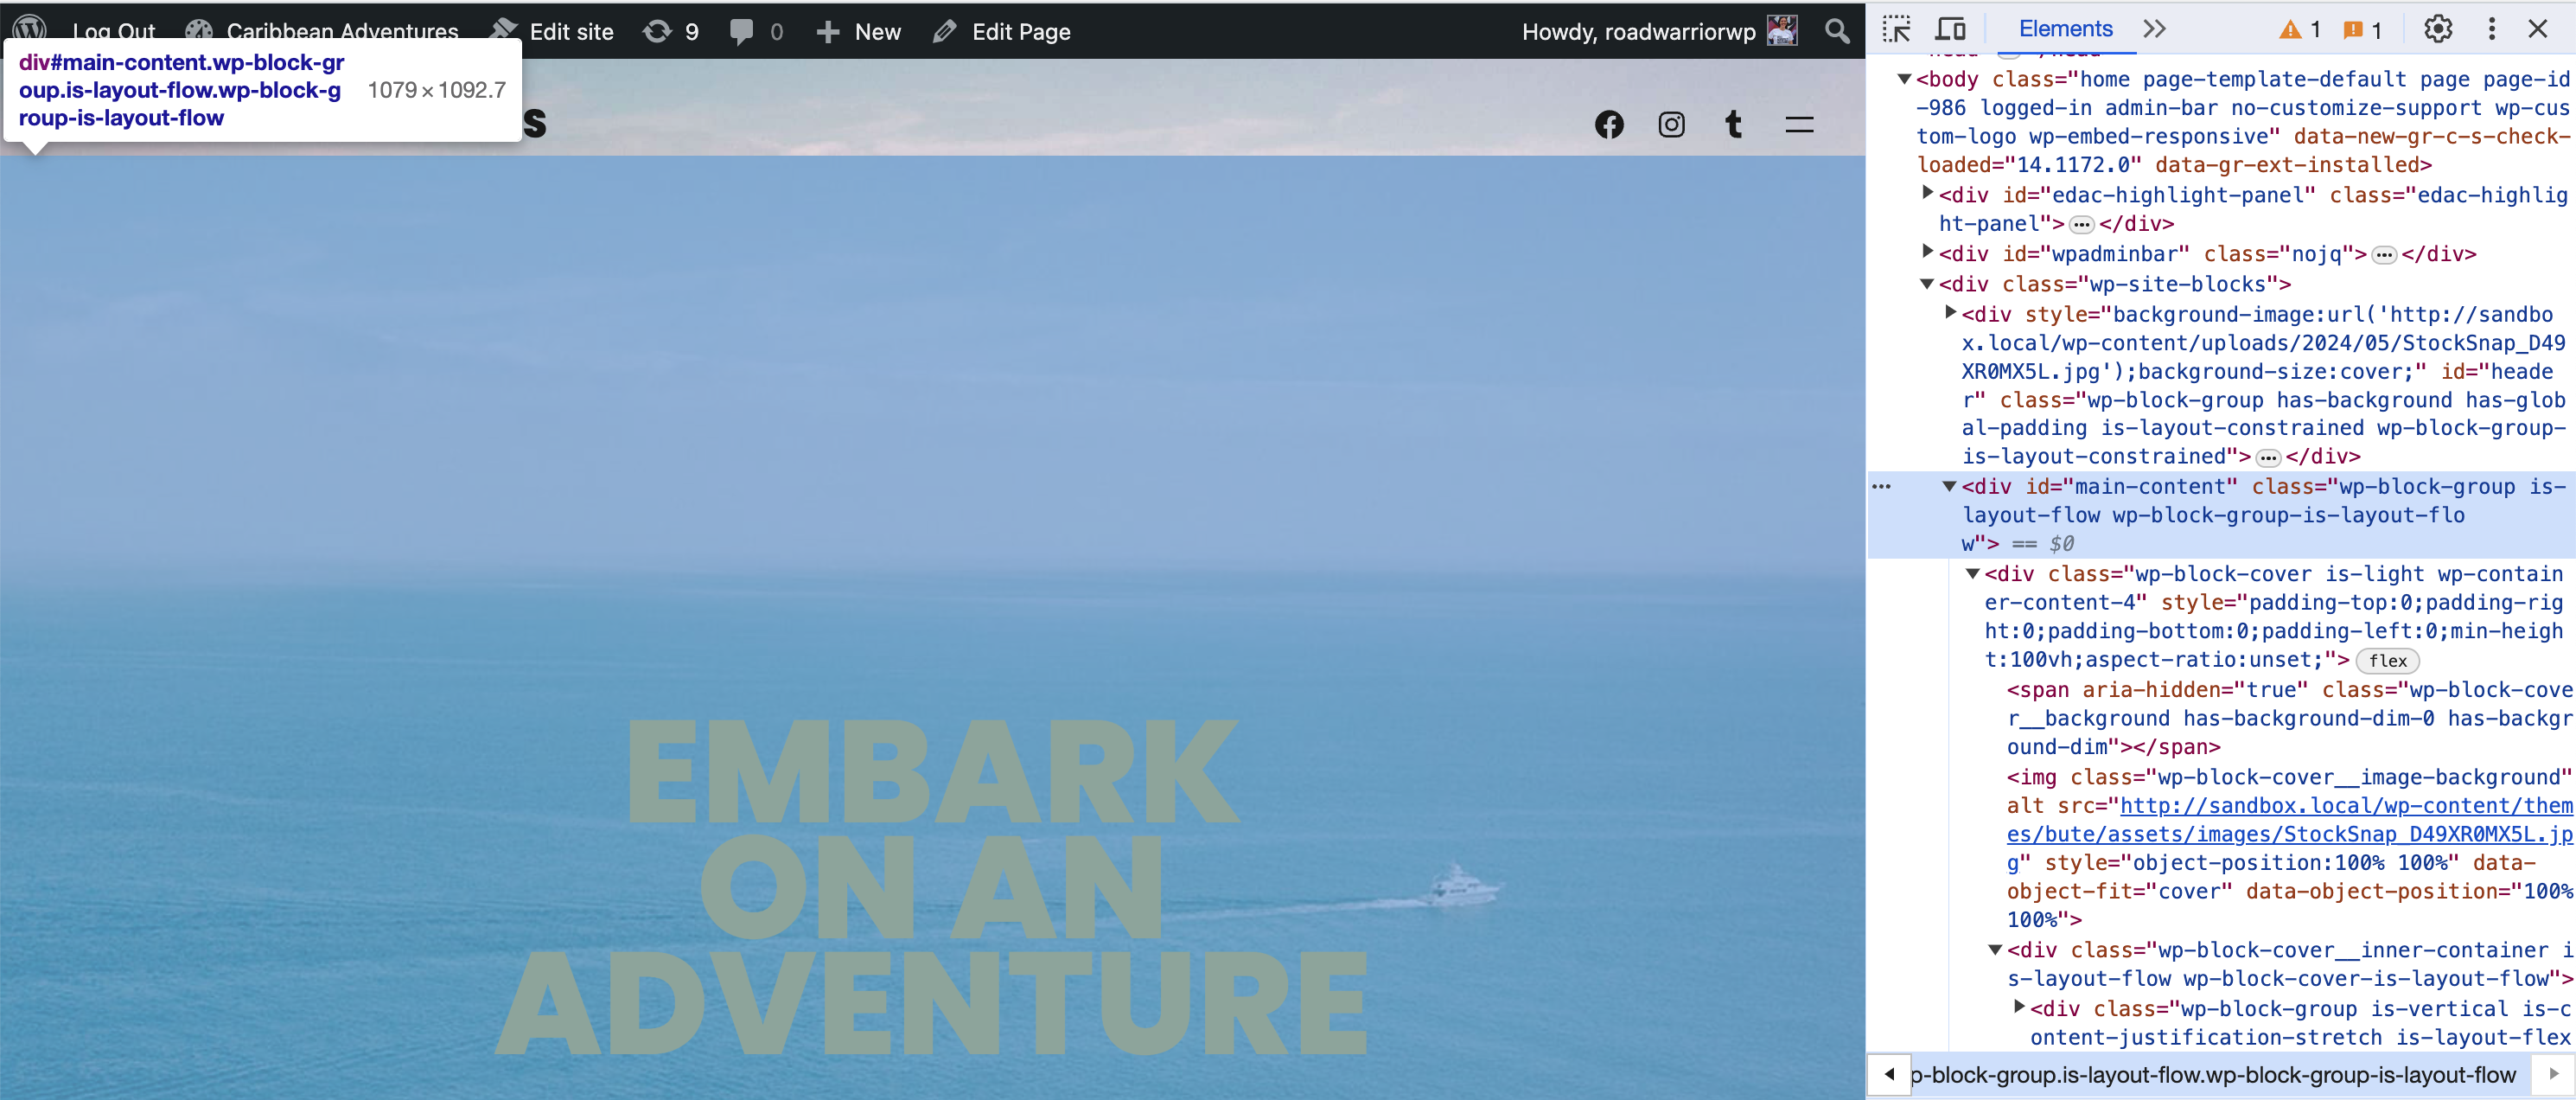
  1. Right-click anywhere on your website and click inspect in the menu that appears. This will open the browser’s dev tools panel. Alternatively, you can open dev tools with a keyboard by pressing Command+Option+I on a Mac or Control+Shift+I on Windows.
    Showing right clicking on the front end of the website opens a menu with an inspect option to open the browser's dev tools panel.
  2. When the dev tools panel opens, you can look at the HTML of the page. You want to find the container that wraps around all of your main content. This may be a <main> tag, or it may be something else like a <div>.

    Once you find that tag, you can see what ID it has. In this example, the container for all the content is a div with the ID of main-content. In the code, it looks like <div id="main-content" class="...">.
    Dev tools inspector showing the main content container has an ID of main-content.

If you have difficulty with this step or you can’t find an ID, ask for help in the WordPress Accessibility Facebook group or via plugin support.

Not seeing the fix?

The Enable Skip Link accessibility fix should start working immediately; however, if you don’t see the fix, it could be because you’re seeing a cached version of your website. Try clearing the cache in any caching plugins and on your hosting account, then look at your site in an incognito window to confirm the fix worked.

Note: Turning on a fix will not instantly remove related issues from Accessibility Checker reports. After turning on a fix, you can clear issues from reports by running a full site scan in Accessibility Checker Pro or by saving any individual post/page to trigger a rescan of that post/page only.

What the Fix Does

When enabled, the Enable Skip Link fix checks if a page already has skip links. If Accessibility Checker cannot detect an existing skip link pointing to a valid anchor, it generates one based on the IDs you have provided in the settings field.

    The fix applies client-side to detect broken anchors or missing skip links appropriately before adding one based on the fix configuration.

    Impact on Accessibility

    Skip links allow users who rely on keyboard navigation or a screen reader to browse your site quicker and more effectively. They allow users to bypass repetitive sections and get right to the page’s primary content, reducing the need to tab through irrelevant sections on every page.

    Primary Sidebar

    Equalize Digital Accessibility Checker. Start making your WordPress Website Accessible Today. Get Accessibility Checker Now.

    Frequently Asked Questions

    • How to Install & Activate Accessibility Checker
    • Getting Started Quick Guide
    • Why Do We Say 100% Passed Tests, Not 100% Accessible?
    • Manual Accessibility Testing: How You Can Check Website Accessibility
    • When and How to Ignore Accessibility Errors or Warnings
    • What to do if There are Accessibility Errors in Your Theme
    • What to do if a Plugin You’re Using has Accessibility Errors
    • How to Get Support for Accessibility Checker
    • Can I Hire Equalize Digital to Fix Accessibility Issues on My Website?
    • Additional Resources for Learning About Accessibility
    • How to Test Accessibility Checker for Conflicts with Themes or Plugins
    • What Does “Unlimited Dev Sites” mean?
    • Is there an Accessibility Conformance Report (ACR) or VPAT available for Accessibility Checker?
    • How to Get the Audit History Plugin – Legacy Customer Instructions
    • How does Accessibility Checker align with WCAG?
    • What to do if Accessibility Checker is not Scanning Your Site
    • Known Conflicts
    • Ensuring Accessibility Checker Fixes Work with JavaScript Optimization Plugins

    Rule Documentation

    • A Slider is Present
    • A Video is Present
    • Ambiguous Anchor Text
    • ARIA Hidden
    • Blinking or Scrolling Content
    • Broken ARIA Reference
    • Broken Skip or Anchor Link
    • Duplicate Alternative Text
    • Duplicate Form Label
    • Empty Button
    • Empty Heading Tag
    • Empty Link
    • Empty or Missing Form Label
    • Empty or Missing Table Header
    • Empty Paragraph Tag
    • iFrame Missing Title
    • Image Animated GIF
    • Image Empty Alternative Text
    • Image Long Alternative Text
    • Image Map Missing Alternative Text
    • Image Missing Alternative Text
    • Improper Use of Link
    • Incorrect Heading Order
    • Insufficient Color Contrast
    • Link Opens New Window or Tab
    • Link to MS Office File
    • Link to Non-HTML File
    • Link to PDF
    • Linked Image Missing or Empty Alternative Text
    • Long Description Invalid
    • Low-quality Alternative Text
    • Missing Language Declaration
    • Missing Subheadings
    • Missing Title
    • Missing Transcript
    • Possible Heading
    • Readability & Simplified Summary
    • Tab Order Modified
    • Text Justified
    • Text Too Small
    • Underlined Text
    • Zooming and Scaling Disabled

    Easier, Faster Accessibility Testing

    Equalize Digital Accessibility Checker gives you real-time accessibility feedback in the WordPress editor. Learn accessibility and make fixes earlier in the dev and content creation process. Full-site accessibility scanning without the per page fees.

    Get Accessibility Checker

    Footer

    Equalize Digital Websites for Everyone

    Your WordPress accessibility team. Accessibility plugins, rapid audits, and consulting to help you make your website usable by people of all abilities.

    • Facebook
    • GitHub
    • LinkedIn
    • Twitter
    • YouTube

    Company

    • About Equalize Digital
    • WordPress Accessibility Meetup
    • Accessibility Statement
    • Blog
    • Events
    • Contact Us

    Services

    • Accessibility Audits
    • User Testing
    • Remediation
    • Ongoing Monitoring
    • VPAT & ACR Preparation
    • Accessibility Training
    • For Agencies
    • Website Development

    Accessibility Checker

    • Features
    • Pricing
    • Documentation
    • How to Get Support
    • My Account
    • Affiliate Dashboard
    • Become an Affiliate

    © 2025 Equalize Digital · Privacy Policy · Terms of Service · Software Terms & Refund Policy

    International Association of Accessibility Professionals member