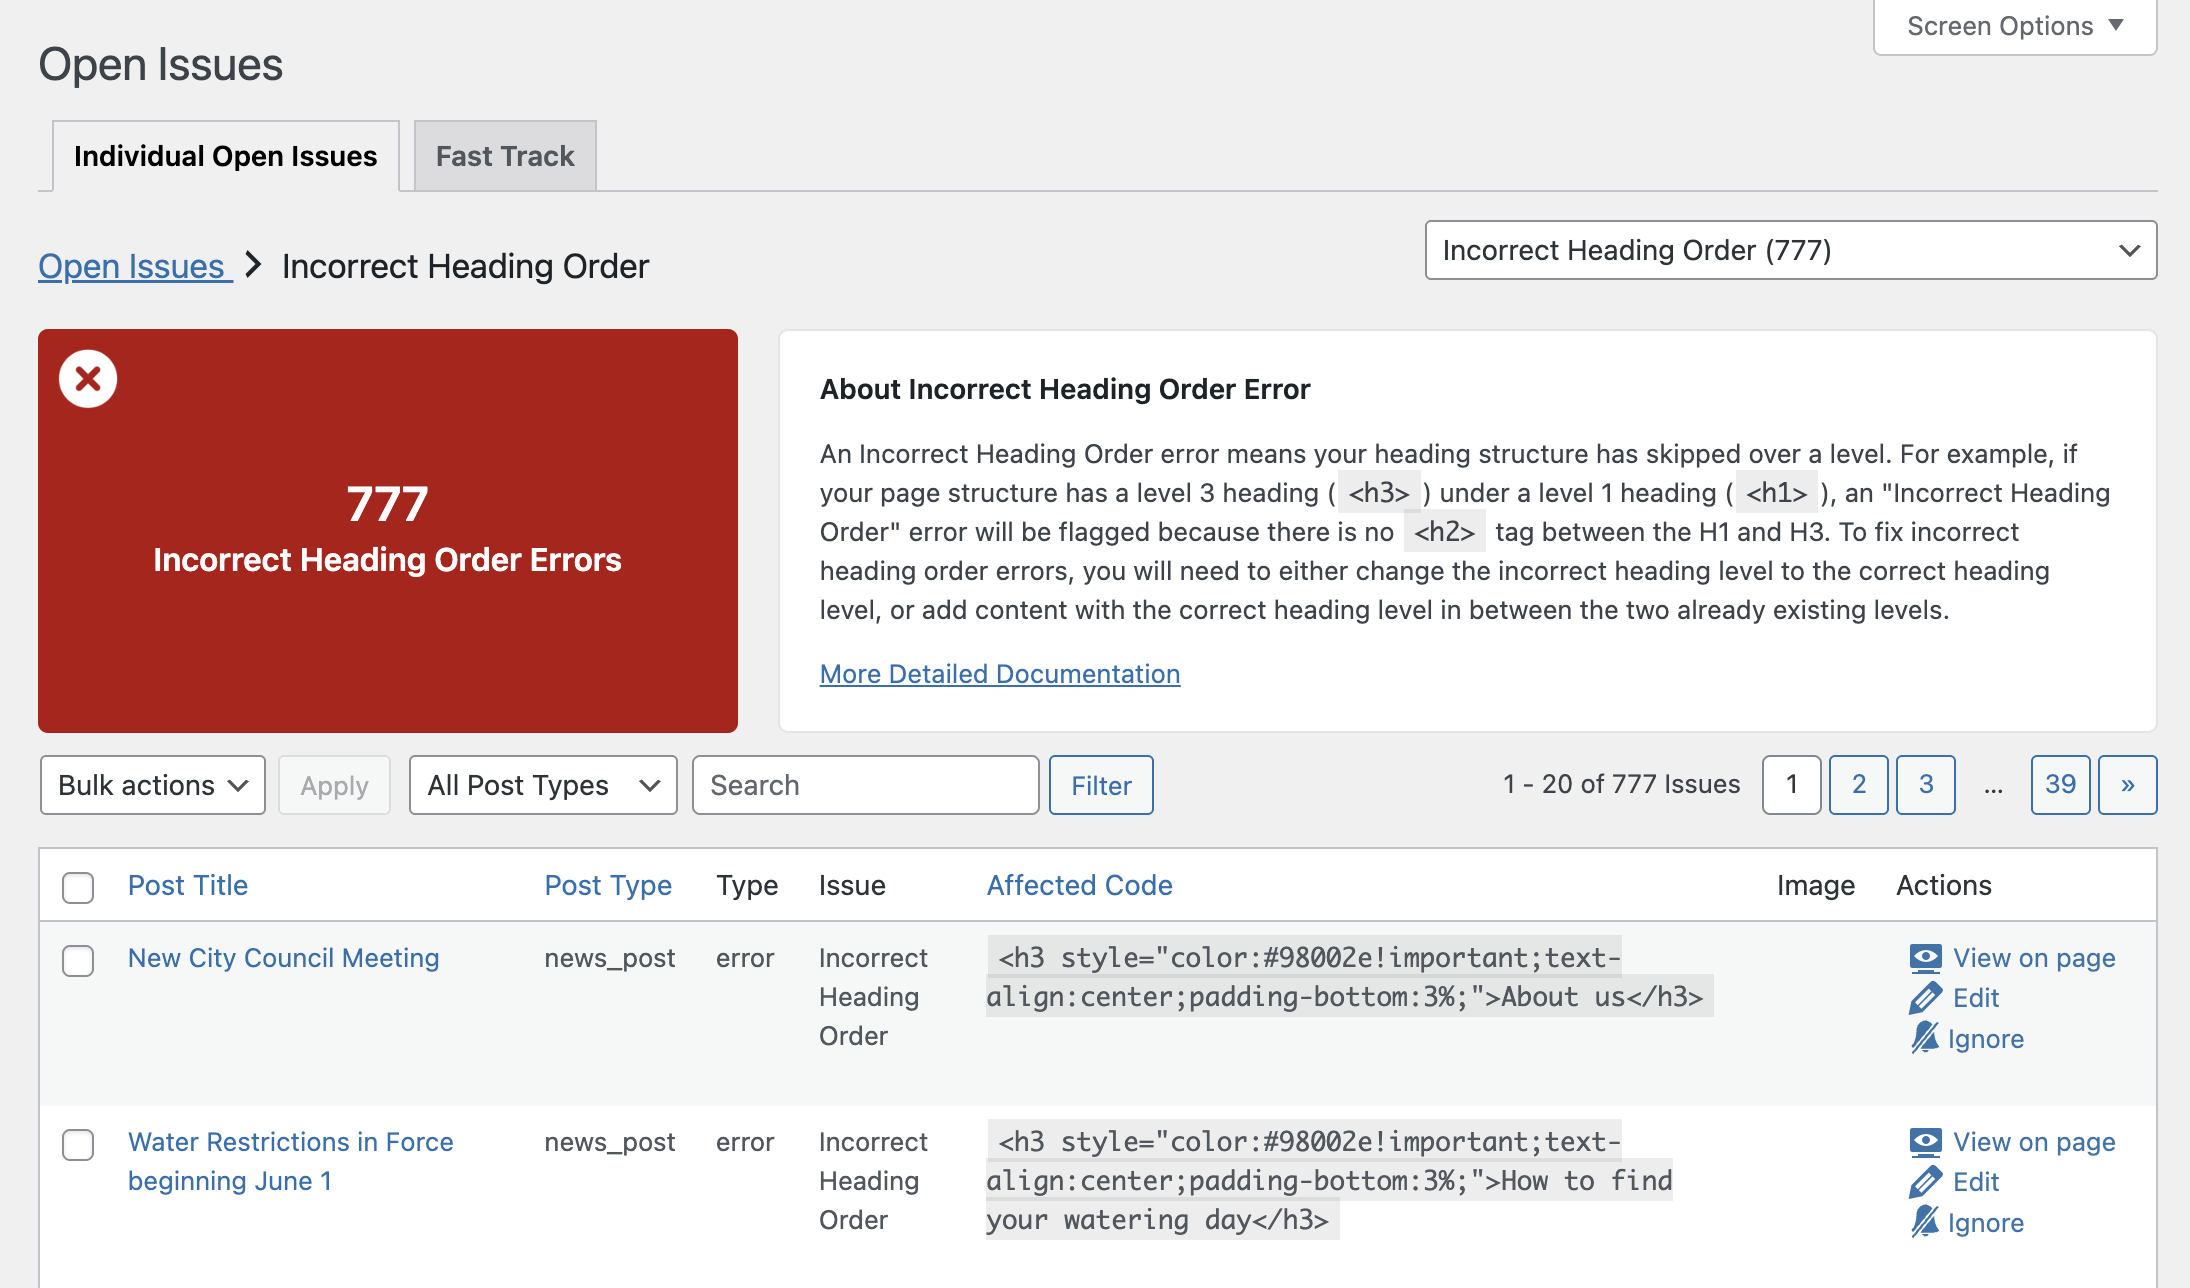
When using our WordPress Accessibility Checker plugin, you may encounter “Incorrect Heading Order” errors.
Sometimes, fixing an incorrect heading order error is a simple fix in the content editor. But other times, incorrect heading levels are created by your theme or a plugin, which results in a more complicated — but not impossible — fix.
This post walks through different scenarios where Incorrect Heading Order errors would be flagged in Accessibility Checker and how you can fix them on your site.
Key Things to Know About Headings
Why heading levels matter
Headings are essential for accessibility as they help screen reader users understand the structure of a page. They also can be used as shortcuts to jump to a specific part of the page.
Users may struggle to follow the content hierarchy if heading levels are skipped or arranged out of order. On the other hand, a page that uses headings to create a proper outline of the page will be easier for assistive technology users to understand. Web pages that use headings correctly will also have the bonus of improved SEO, as search engines will be able to understand the content better, too.
Don’t choose headings for design reasons
✅ Headings should be used to organize and group content.
🚫 Headings should not be used to style something or make it look a certain way.
Not understanding that headings and heading levels are for organizing, not styling content, is the number one reason developers create incorrect heading order/skipped heading level errors on websites.
Rules for setting headings
Here are some things to keep in mind when deciding what heading levels to use (or even if a heading should be used at all):
- The page title should always be the H1.
- There should be only one H1 on a page.
- Headings should always have sub-content.
- Blockquotes or large accent text or numbers are not headings.
- Headings should never skip a level. For example, if the heading before is an H2, then any subitems should be an H3, not an H4, H5, or H6.
- If you have a design style with “eyebrow text” (small text above large text), only one of the lines should be a heading, while the other should be a paragraph — and the large text may not always be the heading. Set the line that most accurately describes the content that follows it as the heading, regardless of how that line is styled.
- Footer or sidebar headings should either be H2, or there should be a screen reader only H2 naming the section (I.e.
<h2 class="screen-reader-only">Footer</h2>) and the headings following would be H3s.
Where Heading Issues Come From
The beauty of WordPress websites is that users of all technical abilities can create beautiful-looking websites without touching a single line of code. Plugins, themes, and template kits can speed up the development of your site. However, they can also cause many accessibility issues if you don’t test for accessibility before installing and activating them.
Common sources of incorrect heading order
Incorrect heading order in WordPress is commonly caused by:
- Theme Defaults: Many WordPress themes or template kits use incorrect heading levels for elements like post titles, widget headings, or sidebar content.
- Page Builders: Drag-and-drop editors, such as Elementor, WPBakery, or Divi, may automatically generate headings based on design choices or assumptions about how their blocks or widgets will be used rather than semantic structure. This can lead to skipped heading levels or improper nesting if the content creator doesn’t correct the heading level when adding the component to the page.
- Plugin Output: Many plugins include headings in blocks, shortcodes, or post templates. These don’t also have settings for defining the heading level and can result in skipped heading levels based on how the shortcodes or blocks are used on the site or if the component was just coded with incorrect heading order regardless of how they are used.
- Content Entry: Content creators frequently choose the wrong heading levels when building pages or writing blog posts because they are choosing headings for their design or size rather than the correct heading in numerical order.
Finding skipped or incorrect headings
With the free version of Accessibility Checker and many free browser extensions (such as WAVE or HeadingsMap), you can easily find skipped headings, one page at a time.
Browser extensions help check individual pages but are not ideal if you have a large site with many pages to check.
The easiest way to find all the skipped headings on your WordPress site is to run a full site scan with Accessibility Checker Pro. In a full site scan, Accessibility Checker crawls all the posts and pages on your site and provides a comprehensive report of all the skipped headings throughout.
Scanning your WordPress site with Accessibility Checker will save you a ton of time over using browser extensions that require opening each page one by one, then clicking the browser extension and interpreting the results.
Once you have a full-site scan report, you can easily pinpoint the location of incorrectly set headings and start fixing them.
Not sure how to fix incorrect heading levels? Read on for examples of how to fix headings in content, plugins, and themes.
Article continued below.
Stay on top of web accessibility news and best practices.
Join our email list to get notified of changes to website accessibility laws, WordPress accessibility resources, and accessibility webinar invitations in your inbox.
Fix 1: Fixing Heading Levels in Content
Whether you’re using the WordPress block editor (Gutenberg), the classic editor, or a page builder like Elementor, correcting heading levels in content is a simple process once you know where to look. Skipped and incorrect heading levels created in the content are the easiest to fix because they rarely require writing code.
In the WordPress block editor (Gutenberg)
- Click on the heading block you want to change.
- In the block toolbar (usually above the block), you’ll see the current heading level (e.g., H3, H4, etc.).

- Click the current heading level to expand the dropdown menu and select the correct heading level.

Don’t like the size or design of the heading you need to use semantically? You go to the design tab in the block settings and change the size, color, and more. It’s OK if headings look different in a particular site section than the same heading level looks somewhere else. What matters most is having the correct heading level selected.
In the Classic Editor
- Highlight the text for which you want to change the heading level.
- In the toolbar above the editor, click the dropdown menu that says the current heading level.

- Select the appropriate heading level (e.g., Heading 2, Heading 3).

Changing the styles for a specific heading level is more difficult in the Classic editor than in the Block editor. To change the styles for these headings, you would need to write CSS either inline in the HTML, in the theme, or customizer. For this reason, you may want to preview these heading changes before publishing them to ensure that style changes don’t need to be pushed live first.
In Elementor or another visual page builder
Here are instructions for changing heading levels in Elementor:
- Click on the widget that contains your heading (often a “Heading” widget, but other widgets like Galleries, Accordions, and more may also contain headings).
- In the left-hand panel, look for the “HTML Tag” option, typically one of the last items on the “Content” tab. This example shows the “Title HTML Tag” dropdown in Elementor Accordions.

- Change the heading tag to the correct level.

One of the nice things about Elementor is that frequently changing the heading tag has very little or no visual difference. If the semantically correct heading causes sizing or design issues, you can fix those on the style or advanced tabs tab for the widgets.
Here are documentation articles with instructions for changing the heading level in other popular page builders:
- Beaver Builder: Heading Module – Beaver Builder Knowledge Base
- Divi Builder: The Divi Heading Module – Elegant Themes Help Center
- WPBakery Page Builder: How to Add and Edit Text in WPBakery Page Builder
- Brizy: Brizy Text Module and Global Typography – Brizy Support
Fix 2: Updating the Heading Structure in a Commercial Theme
If your WordPress website is built with a commercial or free WordPress theme and has incorrect heading levels coded into the theme, you can correct the heading levels in a child theme.
About Child Themes
A child theme in WordPress is a theme that inherits the design and functionality of another theme, called the parent theme. Child themes allow you to customize and modify your site without altering the parent theme’s files. This way, when the parent theme is updated, your customizations are preserved.
At a minimum, a child theme consists of:
- A folder in the
/wp-content/themes/directory. - A
style.cssfile with a special comment at the top that references the parent theme, so WordPress knows that the theme is a child theme of another theme when activated.
Optionally, a child theme can also have a functions.php file to enqueue styles or add custom functions, JavaScript files, or modified template files.
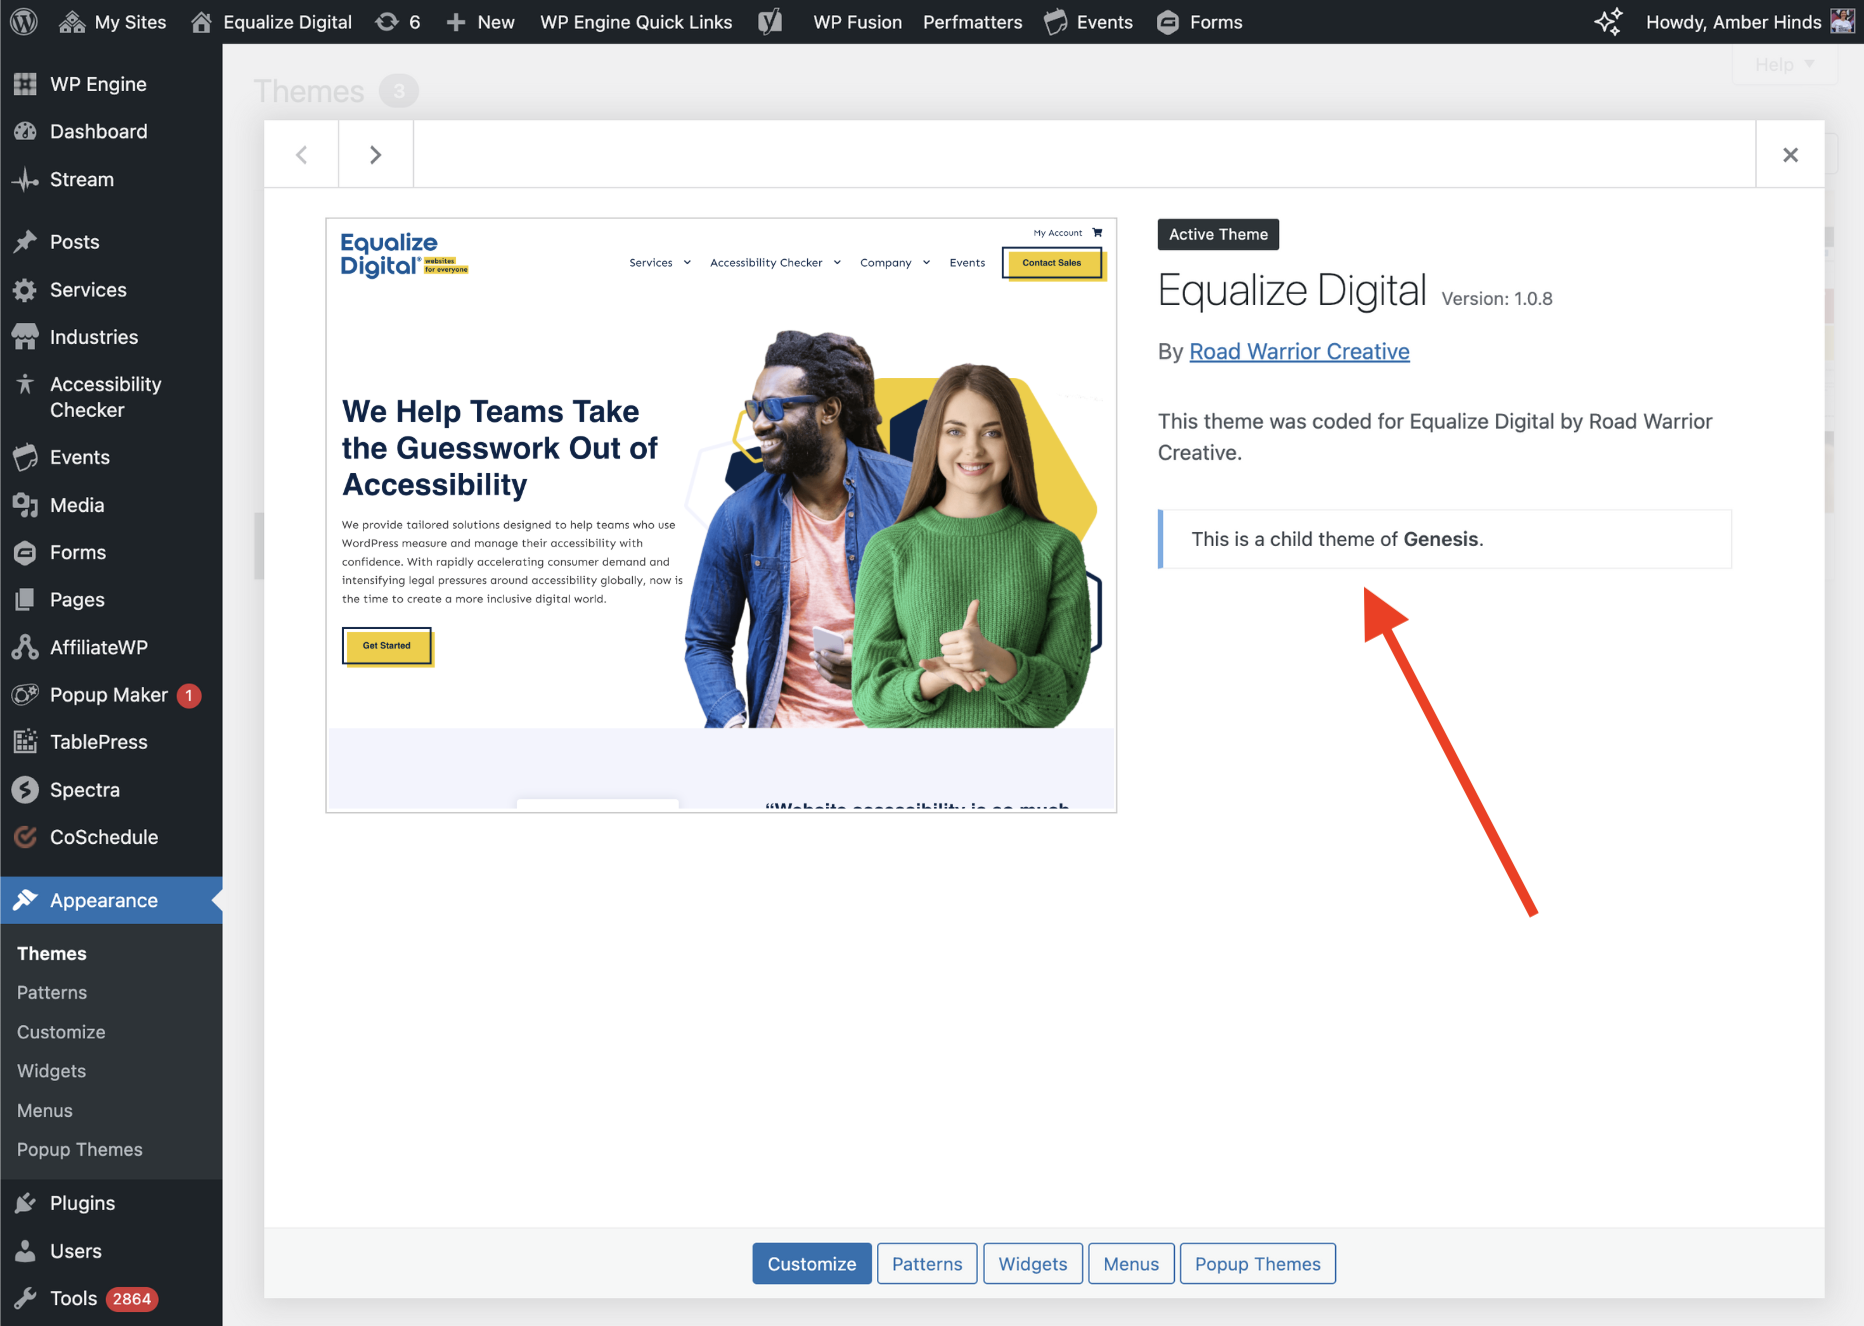
How to check if your website has a child theme
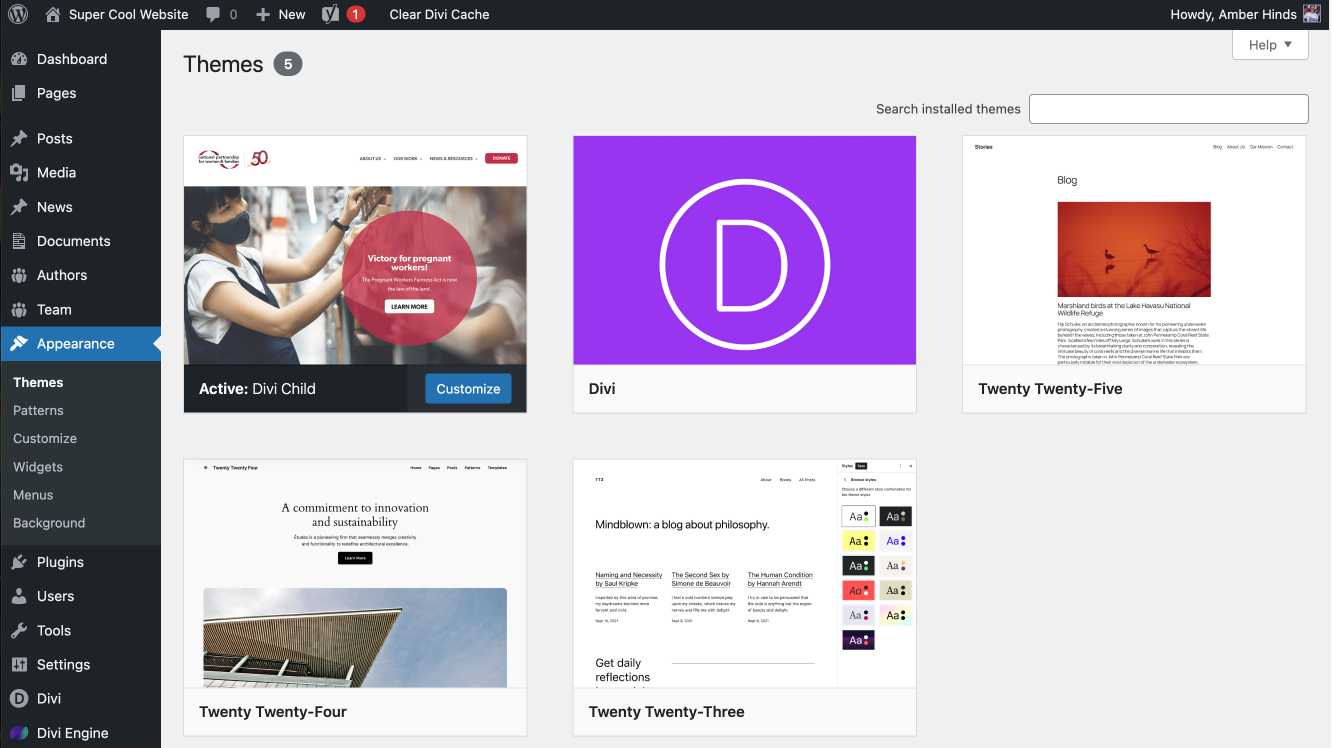
- Log into your WordPress admin and go to Appearance > Themes
- Look at the active theme and see if it is identified as a child of another theme.
You may be able to tell if a theme is a child based on the name alone. For example, this website’s active theme is named “Divi Child,” and the Divi theme is also installed.
If you can’t tell by the name, click on the theme’s image to view theme details and look for a message that says “This is a child theme of [Parent Theme Name].” Here’s how that looks on our website:
If your website does not have a child theme already, then you can add one following the instructions on how to create a child theme in the WordPress developers handbook.
If your website already has a child theme, then you can safely edit the existing child theme, as child themes do not receive update.
Fixing headings in the child theme
If your child theme has templates with incorrect heading levels, you can update the template files directly to fix the issue. As a best practice, you should make code changes to your theme on a staging or local dev site before making them on your live website.
To fix heading levels in your child theme, follow these steps:
- Navigate to your WordPress theme files however you plan to edit them (on local dev or via a file manager).
- Locate the template file that outputs the headings (e.g.,
single.php,page.php,header.php, etc.). - Find the incorrect heading tag in the code and modify it to maintain a logical order.
- Save the file and refresh the page to test the changes.
You may also need to adjust the CSS to style your corrected heading level as needed.
How to override a parent theme template in a child theme
If you’re working with a child theme that doesn’t have templates in it already and want to override a specific template from the parent theme, here’s how to do it—step by step:
- Locate the file in the parent theme that outputs the heading you want to change.
- In your child theme directory (
/wp-content/themes/your-child-theme/), create the same file path if the file you want to copy is inside a subfolder like/template-parts/. - Copy the original file from the parent theme into your child theme, preserving the structure.
- Edit the heading level in the new file in your child theme.
For example, this file added to the child theme:
/wp-content/themes/your-child-theme/template-parts/comments.phpwill override this file in the parent theme:
/wp-content/themes/parent-theme/template-parts/comments.phpUsing PHP Conditionals
PHP conditionals are helpful if you don’t want to create multiple templates for different page types or want to use logic to determine which heading level to use where.
This code snippet dynamically adjusts the heading level of a post title based on the context in which it’s displayed. If the post is being viewed on its own page (a singular view, like a single post or page), the title is wrapped in an <h1> tag — which is ideal for accessibility and SEO, since each page should have one main heading. However, if the post is part of an archive or a blog listing page, the title is displayed inside an <h2> tag and linked to the full post.
Fix 3: Template Overrides for Plugins
What if the incorrect heading level comes from a plugin instead of your theme?
Many plugins are designed with overrides in mind, which makes it possible to customize their templates from your theme or child theme. However, this process is different than overriding files from a theme.
How to tell if a plugin allows template overrides
If you’re not sure if the plugin supports template overrides, start by checking the plugin’s documentation. Most plugins that support template overrides will document the process clearly — search for terms like “template override”, “custom templates”, or “theme compatibility”.
If you can’t find anything in the documentation, look in the plugin’s files.
- Browse to
/wp-content/plugins/plugin-name/. - Look for a folder called
/templates/,/views/, or similar. - Look for comments in template files like:
/** This template can be overridden by copying it to yourtheme/plugin-folder/template-file.php*/
Put templates in the right directory
Some plugins define a custom folder name for where you need to but templates in order for the override to work. For example:
- WooCommerce templates go into:
/wp-content/themes/your-theme/woocommerce/ - GiveWP templates go into:
/wp-content/themes/your-theme/give/
The folder name matches what the plugin expects — this is defined in the plugin’s code (using something like get_template_part() or a custom override loader).
How to Override a Plugin Template (When Allowed)
- Find the template file in the plugin.
- Copy it into your child theme using the path specified by the plugin.
- Edit your copy as needed — the plugin will use your version instead of its own.
Important things to keep in mind:
Always use child themes when overriding templates if you don’t have a custom theme. If you’re using a commercial theme that receives updates, avoid losing your customizations by putting plugin overrides in a child theme.
Don’t edit plugin files directly — your changes will be lost during updates.
Not all plugins support template overrides — if the plugin doesn’t check for theme templates, you may need to use filters or actions instead to modify output.
Fix 4: Using PHP Filters to Adjust Heading Levels
About Actions and Filters
In WordPress, actions and filters are types of hooks that allow developers to customize how WordPress functions—without modifying core or plugin files. They’re essential tools for extending WordPress themes and plugins in a safe, upgrade-friendly way.
Actions let you add custom functionality at specific points during WordPress execution. Think of an action as a trigger: “When WordPress reaches this point, run this custom function.” Actions do not return anything—they simply perform a task. For example, you might use an action to insert an H2 heading before a plugin’s output if it’s missing a heading completely.
On the other hand, filters allow you to modify data before it’s displayed or saved. They’re used to intercept values and change them. Think of filters as saying: “Before WordPress outputs this value, let me change it.” Unlike actions, filters must return a value—usually a modified version of the input. Filters allow you to change incorrect heading level to the correct heading level.
As a rule of thumb, use an action when you want to do something, like enqueue a script or insert text. Use a filter when you want to change something, like modify content output or HTML structure.
Many themes and plugins provide hooks intentionally, and you can usually find them documented—or by searching their code for do_action() or apply_filters().
How to fix heading levels with a PHP filter
For dynamically generated headings (such as those from WordPress widgets, custom post types, or shortcodes), you can apply a PHP filter to modify the output before it is displayed.
Here’s an example of a broad filter that will change all headings in the content from one heading level to another.
This code would be placed in your theme’s functions.php file or within a custom plugin.
When looking at plugin code for elements that can be edited with a filter, you might see that individual headings are filterable, which would look like this in the PHP code:
$title = apply_filters('plugin_shortcode_title', '<h5>' . $title . '</h5>');You can then use this filter in your theme’s functions.php file to change the heading level like this:
add_filter('plugin_shortcode_title', function($title) {
    return '<h2>' . strip_tags($title) . '</h2>';
});
This filter would change the heading from an H5 to an H2.
More often than not, individual headings will not be filterable, but you’ll see that an entire shortcode or block is filterable. In that case your filter will need to include all of the components of what you’re filtering with only the heading modified.
Learn more about using WordPress filters in this tutorial.
Fix 5: Using JavaScript to Adjust Headings Dynamically
If modifying template files or PHP filters isn’t an option, you can use JavaScript to change heading levels on the front end dynamically. This is not the most performant or best option, but it may be the only option if a plugin on your site has accessibility problems and isn’t editable in other ways.
JavaScript to fix accessibility problems on page load can be added to your child theme or inserted via a code snippets plugin. Typically, you want this JavaScript to load in the page’s footer for the least impact on speed and performance.
Example of changing a specific H5 to an H2
This example looks for a specific <h5> element with a unique id, “#plugin-block-heading1“, and changes the heading level for that heading to an H2.
In this example, the method document.getElementById('plugin-block-heading1') is used to find the element with the corresponding id. After confirming that the element exists with if (h5Element), the script proceeds to create a new <h2> element and copies the content from the original <h5> into the newly created <h2>. Finally, the original <h5> is replaced with the new <h2> using the replaceChild method.
This approach ensures that only the targeted heading with the specific ID is modified, leaving any other <h5> elements that may exist on the page unaffected.
When JavaScript won’t work
JavaScript can seem like a “magic” fix for accessibility problems, especially if you spend time reading the marketing material on accessibility overlay websites. It’s essential to be aware that there are instances where it might be challenging or even impossible to target the correct element or fix the heading level using JavaScript.
Below are a few scenarios JavaScript fixes may not work:
Dynamic content or AJAX-loaded content
On WordPress sites that use AJAX or other dynamic content loading methods (e.g., infinite scroll or content loading after user interaction), headings might be added to the page after the initial page load.
JavaScript that runs on page load won’t be able to target these newly added elements. To address this, you’d need to use event delegation or rerun the JavaScript after the new content is loaded.
Multiple elements with the same ID
In HTML, IDs must be unique on a page, but it’s possible for themes or plugins to break this rule by using the same id for multiple elements. If two or more <h5> elements share the same id, using document.getElementById() will only target the first one, potentially missing others that you want to modify.
Some plugins may also generate non-standard, incorrect, or unexpected HTML markup that makes it harder to apply global JavaScript rules.
No unique identifier
If a heading does not have an ID and is not nested in a container that makes it possible to uniquely target that heading only, it can be very difficult to change that heading without impacting others on the page.
Some WordPress themes and plugins might create very nested HTML structures with headings inside other elements (like sliders, carousels, or custom widgets). If the structure isn’t straightforward, your JavaScript might inadvertently modify the wrong elements.
In these cases, more precise targeting (e.g., using class names, custom attributes, or more complex selectors) is needed, and the risk of accidentally modifying the wrong element increases.
CSS/JavaScript manipulation from plugins or themes
Some WordPress themes or plugins dynamically manipulate the DOM or use JavaScript frameworks like React or Vue.js, which can make it difficult to track changes in real-time with simple JavaScript.
These plugins or themes might rewrite or inject HTML after your script runs, causing conflicts with the JavaScript code you’ve written to change the heading.
Heading elements rendered inside iframes
If headings are part of an embedded iframe (such as content from a plugin or third-party service), you won’t be able to access or modify the content inside the iframe with JavaScript running on the main page, unless the iframe content is from the same origin (same domain).
In such cases, you would need to apply your JavaScript to the iframe’s content specifically, which may not always be feasible, or ask the developer of that embed to make the fix.
User role or permission-based content
If the content is displayed differently based on user roles (e.g., administrators, subscribers), JavaScript may modify the headings on one view but fail to do so on others. This is especially true if content is hidden or displayed dynamically based on user permissions or settings.
Verify Your Fix
After applying any of these fixes, confirm that the issue is resolved by:
- Running a new scan in Accessibility Checker.
- Using developer tools to inspect the heading structure.
- Testing with screen readers (e.g., NVDA, JAWS, or VoiceOver).
- Checking the heading hierarchy with the HeadingsMap browser extension.
If the heading level has been fixed, rescanning the page or full site with Accessibility Checker should remove the error or errors you previously saw in reports.
Take an online course to learn screen reader testing
If you want to learn more about how to use a screen reader for accessibility testing, check out our online courses. These courses include detailed instructions on how to use a screen reader, what keyboard shortcuts to know, recommended settings for testing, and good and bad examples of multiple different components so you know what to listen for.
What if a Heading Can’t be Fixed?
As mentioned above, there are instances when it can be impossible to correct an out-of-order heading. This most commonly occurs with poorly coded WordPress plugins that were not made to be extendable or third-party embeds.
Incorrect heading order can create serious accessibility barriers, so it is vital to resolve heading level errors or remove the component from the website. If you can’t fix the issue on your own site, here are some steps to take:
- Report the issue to the original developer. See if they will fix the heading level or add a filter so you can fix it on your site.
- Fork the plugin so you can modify it directly. This will result in the plugin no longer getting updates, but it may be a valid approach if you need the functionality the plugin provides.
- Switch to a different solution. Remove the plugin or third-party component and replace it with a different plugin or solution that provides similar functionality but has better accessibility out of the box.
If you have any questions or need help remediation your website, we can help! Learn more about our WordPress accessibility remediation plans or contact our sales team to get started today.