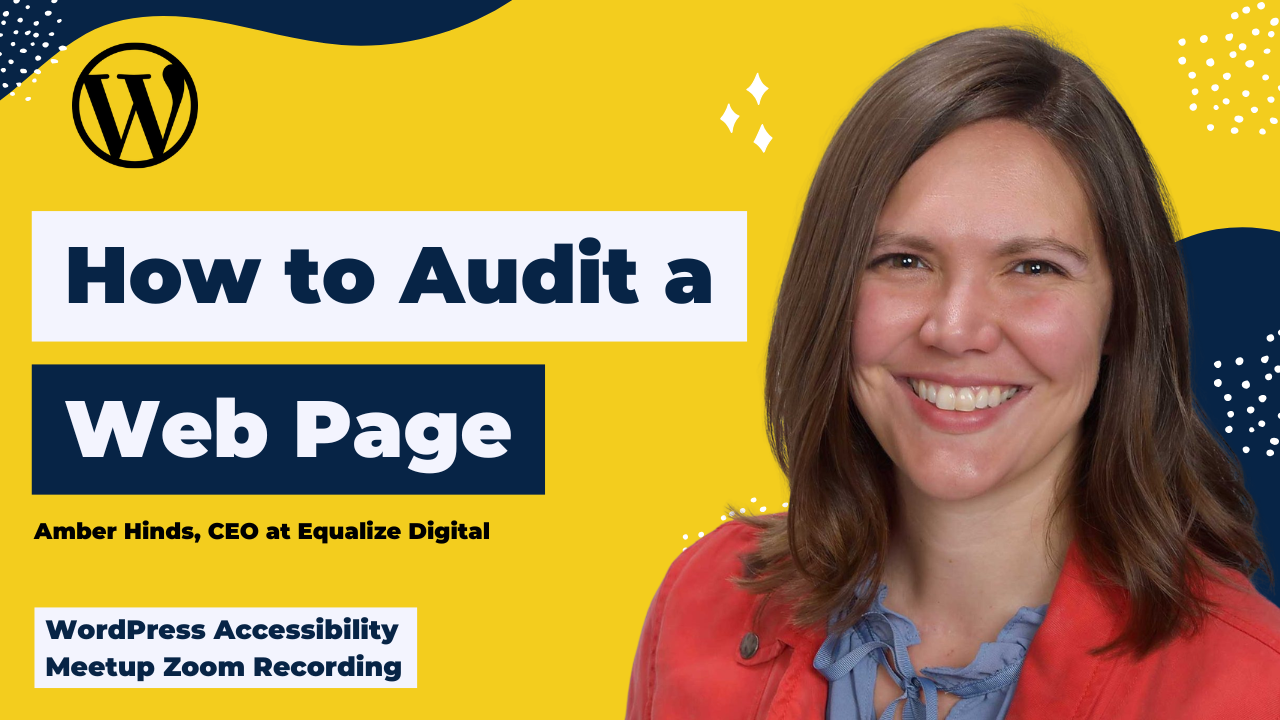
Ever wondered what actually goes into a professional accessibility audit? Looking for tips to include in your own auditing process? In this session, Amber Hinds, CEO of Equalize Digital, pulled back the curtain on the real-world process her team uses to audit web pages for accessibility.
Thanks to Our Sponsor
Watch the Recording
If you missed the meetup or would like a recap, watch the video below or read the transcript. If you have questions about what was covered in this meetup please tweet us @EqualizeDigital on Twitter or join our Facebook group for WordPress Accessibility.
Read the Transcript
>> PAOLA GONZALEZ: Welcome, everyone, to WordPress Accessibility Meetup, How to Audit Webpages: Behind the Scenes on Equalize Digital’s Process. This is with Amber Hinds, CEO at Equalize Digital. A few announcements. If you want to stay connected between meetups, the best way to do that is joining our Facebook group. The website is facebook.com/groups/wordpress.accessibility. There we talk about anything and everything in disability, sometimes not always related to WordPress, but anything accessibility. It’s a great place for you to connect, have, ask questions and answer questions about accessibility. You can also find upcoming events and past recordings in one place. This meetup is being recorded, and it will be up in about two weeks’ time when we get corrected transcripts. You can find all of our past recordings at equalizedigital.com/meetup. You can join our email list to get news and event announcements at equalizedigital.com/focus-state. We send a newsletter every week, and we also send meetup reminders. Tune in, you can also listen in to the audio version of the meetups and accessibility talks on our podcast. You can find it on accessibilitycraft.com.
If you have suggestions for the meetup or need any additional accommodations to make the meetup work for you, you can contact us at meetup@equalizedigital.com. That email goes to both me and Amber, or you can write to me during the meetup in the chat as well. Who are we? We’re the organizers of WordPress Accessibility Meetup Equalize Digital. We are a mission-driven organization and a corporate member of the IAAP, focused on WordPress accessibility. We have a WordPress plugin accessibility checker that helps you find and fix problems on your website.
We also offer online courses for NVDA and VoiceOver screen reader testing. We also offer accessibility audits, remediation, and consulting. You can learn more about us at equalizedigital.com. We would love to say thank you to our sponsor for live captioning and post-event transcripts, Kinsta. Kinsta provides managed hosting services for WordPress. It is powering 120,000 business worldwide, and based on the user reviews, it is the highest rated managed WordPress host on G2. It has everything you need, including an unbeatable combination of speed, security, and expert support.
Powered by Google Cloud at the fastest C3D and C2 servers, combined with CDN and Edge Caching. Your sites are secured with Cloudflare Enterprise, protecting you from DDoS attacks. All plans include free migrations, and the first month of the starter plans is completely free, so you can try the service risk-free. You can find them on kinsta.com. You can also find them on any social media that you’re on. We would very much appreciate if you tag them and say, “Thank you for sponsoring WordPress Accessibility Meetup.” We also would like to announce a few upcoming events that we have.
We have a Scaling Accessibility: Treating Accessibility as Frontend Architecture, and a Leadership Responsibility with Niharika Pujari. This is on Tuesday, March 17th at 10 AM Central. Same time slot, and this is only for a 60-minute meetup. Then the next one is going to be Beyond Technical Accessibility: European Accessibility Act Compliance Requirements with Ben Hannon. This is going to be on Thursday, April 2nd, at 10 AM Central. I would like to introduce today’s speaker, Amber Hinds. You know her, she’s always here. She’s the CEO at Equalize Digital, and she’s the lead organizer of the WordPress Accessibility Meetup, board president, co-lead organizer of the WP Accessibility Day nonprofit, and participates in the WordPress core accessibility team.
I’ll let you, Amber, take over. While you share your screen, I would like to let everyone know that we have the Q&A box available. If you have any questions during the meetup, it’s best if you post them in the Q&A box so that it’s easier for us to track. We’re going to be keeping an eye in the Q&A as Amber presents, so that she can answer your questions as they come through. Go ahead, Amber.
>> AMBER HINDS: Welcome, everyone. Hopefully, you can see my screen. Maybe give me a thumbs up or some emoji reaction. Not a sad face, because then I’ll think you can’t see my screen. Okay, I see at least one. As Paola said, she’s going to interrupt me, and we’re going to try and take questions throughout instead of holding to the end like we frequently do. Please do put those in, but it is way easier to track them in the Q&A, as she said, than in the chat. The quick question on, will there be a recording? Yes, there will be a recording.
It takes us about two weeks to get corrected, captions and a full transcript, and then we send those out.
You can find them on our website, or if you’re on our email list, you’ll get notified. Today, we’re going to talk about how to audit a webpage and go behind the scenes on what our process looks like at Equalize Digital. I’ve broken this into a few different sections, and we are not just going to stay in slides, so don’t worry. We’re going to go back and forth between some slides. Paola should be able to post the link to these here in the chat for you as well, so you can access them, if you want, on Google Slides. We’re going to go between the slides and some different spread [Inaudible 00:06:41]
What I’m going to do is I’m going to talk about first how you know what to check, what process and tools we use, how we report issues. Then I’ll actually do some live testing demo. It’s a lot of stuff to cram into 90 minutes, so I’m going to do my best, and hopefully, we’ll get through all of it. Then, as I said, we’ll do questions along the way, but if you have any final questions, I’ll try and leave some time at the end as well. Starting with knowing what to check. Of course, if you’re going to do a website accessibility audit, you have to first know how to test things.
How do you know what to look for? Before an audit begins, we always start by knowing what we’re testing for, and what that specifically means is Web Content Accessibility Guidelines, or what I’m going to be pronouncing as WCAG, W-C-A-G. I’ll say that as WCAG during the talk. What version? There are different versions. We typically always test to the most current version, but that may not be the case for your organization or your clients. Then, what level? Are you going to be doing AA or AAA? We do have a lot of folks increasingly that are saying, “Yes, test it all, tell us the AAA. We may not fix all those things, but we want to know about them.”
Then we have had a few other people who say, “No, we really only want to hear about AA because we don’t want to muddy the water.” You want to establish that first. Then you also want to know are you testing for any requirements beyond WCAG? EN 301 549, for example, which is the standard that is referenced by laws in Europe, has some testing requirements that go beyond WCAG for software or documentation or how they provide support to people with disabilities and other communication needs. It is important to establish that and be aware if you need to do that in the beginning.
Of course, know who is the primary audience. Typically, when we are doing testing, we are testing with a lot of tools on either a desktop or sometimes mobile, and we’re doing NVDA and VoiceOver, so we get both Windows and Mac coverage. That said, if you know that there’s a specific group of audience that uses JAWS, then you may want to make a plant test with JAWS, which is another screen reader for Windows. Or if you know, hey, this is an organization that works with people with limb differences, and they may have a larger percentage of users going on the website that use alternative input devices or rely on voice control, then you need to make sure that you are using whatever technologies that audience is doing.
It’s really important to know that first. Then we’re not going to have enough time today to go through and talk about literally everything you have to test for. I do want to be upfront about this, that conducting a thorough audit does require a very strong understanding of the guidelines and experience using assistive technologies. This doesn’t mean that if you’re not an expert, you can’t start accessibility testing. You absolutely can. I’m going to provide in a minute, a resource that is helpful for that. You have to really spend a lot of time training and practice and reading the standards and reading articles.
Showing up here at webinars like this is super helpful. It does get easier over time, but you have to understand that knowing what to look for when you get on a website is not something that happens overnight. If you do it more and more, it’ll be pretty easy. There are things I can open a webpage, and I don’t even need to open a contrast tool, and I just instantly know, oh, this is going to fail. There are things that, over time, you learn them and you can just say, “I don’t need to test this. I can just tell that this is going to be a problem. You do have to familiarize yourself with WCAG.
I have an image up here on the screen that shows the first top section of WCAG documentation from that website. What I have is arrows pointing at different things. When you visit the website, you’re going to have a number. Number 1, perceivable. This is the principle. It’s like the overall grouping of the success criteria. Then, within them, you have guidelines. An example guideline that is shown in this screenshot is guideline 1.1, text alternatives. This is not something that is testable. It’s not something that you have to check for. This is a heading that describes a basic goal of all of the success criterion below that.
The success criterions are things that are testable and that you can use to determine if something is accessible and to which level. The success criterion that you can see on the screen is 1.1.1 non-text content. I have a line going over it, so you can’t read all of the information. Obviously, go to WCAG if you want to read it. Basically, it’s saying all non-text content that is presented to the user has a text alternative that serves the equivalent purpose, with some exceptions. Then it has listed out different exceptions. Then, to the right in this screenshot, there are links highlighted that go to understanding non-text content and how to meet non-text content.
When I first started testing, I spent a lot of time reading those understanding docs and how to meet docs. Even now, there are occasionally times when I’ll encounter something on a website, and I’ll be like, “Boy, does this fail? Does it not?” I’ll go back and revisit those. This documentation is really helpful, and you do have to learn these in order to be able to test. That said, you don’t just have to memorize WCAG because that can be really difficult. Even experts use checklists. What I have for you, Paola can share a link to where you can get this off our website if you want to access the spreadsheet.
We’re going to go look at it in just a second. We spent a bunch of time, Maria and I, coming up with this very detailed checklist of things that we need to do on a per-component basis because the only way that we can have– Oh, and I’m gesturing, so I’m getting weird things on my camera. The only way that we can really be consistent and making sure that nothing is missed is having a checklist. It’s really helpful. What we built, and we have an internal copy of this that I provided for you all, it’s a Google spreadsheet. It has a few different tabs.
I’m going to skip the first one and go to the second tab, which is called Testing Checklist. You can, by the way, copy this if you click File. You should be able to make copy and save it to your Google Drive, and then it will be shareable and editable, and you can do whatever you want with it. Basically, we have 626 different checks. At the top of this, we have things for the whole page. It starts with the page has a descriptive and meaningful title element. The primary language of the page is programmatically identified, with an example, HTML Lang equals EN.
Content in different languages is programmatically identified. All of the things you’d have to check for the whole page. Then we have different things like cookie banners, landmarks, navigation menus, breadcrumbs, headings. She and I put a ton of time into going through and being like, “What are all the things that we have to make sure we look at on this to make sure we don’t miss it?” The second tag is our WCAG quick reference, or sorry, the third tab. The second tab, the Testing Checklist, actually pulls the level just by matching off the success criterion.
This is helpful because it has every success criterion from WCAG with a short, little, plain text explanation of what it is, because it can be a little bit dense in the actual guidelines and standards themselves, so we have this as a reference. There are links if you want to jump over and read it on the actual website. Then what we did was this first tab is Checklist Builder, and what you do is you select a component. For example, I could say, “I’m going to test a page.” I need a whole page. It does have a cookie banner. I want to check landmarks, navigation menu.
There’s no breadcrumbs, so I don’t need that. Headings, is there Search on this page? Yes, there’s Search. Is it in a modal? Yes. You can just check off all the things you need. Then you can say, if you want to include AAA, this is yes, but maybe I’m going to say no. Then, what it does is, in a second here, it spits out a checklist from that second tab only related to the items that you have selected, so it makes it a little bit easier. Then basically, as you test, you can just go through and check it out, and be like, “Yes, I checked that. Yes, I checked that. Yes, I checked that.”
You can just use this over and over again, or, which is what I do, I don’t make a copy of it for every client, but you could also be like, “Every client or every audit project that I’m going to do, I’m going to make a copy. Then I have the history of these are all the things that I tested and looked at.” This is really helpful to have one of these. I’m going to reset it because if y’all are copying it, it’s going to copy with what I just put in. This kind of thing is really helpful to make sure you don’t miss something, especially when you’re getting started.
That’s what that is. I don’t know if we had any questions about checklists. If we do, pop in and let me know, Paola, but I’m going to keep going for a second about process. Let’s see. What does our audit process look like? We know what we’re going to test. We’ve learned all the guidelines. We’re actually going to do an audit. For us, of course, we’re doing external audits for folks. What I’m going to be talking about in this scenario for most of this presentation is when we are doing an audit for other people that have dev teams, and we’re just delivering a report to them.
The process that I’m outlining here is not the same for our audit and remediation clients. It’s also not the same for our own internal. Only because when our dev team is working on stuff, because our dev team does accessibility remediation all the time, we don’t give them as many details. We can just be like, “Change this heading level to an H2.” We don’t need to say why. We don’t have to say what success criterion it fails. They just do what we tell them to do. That’s the beauty of working with your own team. When you are delivering an audit for external stakeholders or for a contract developer, or maybe even your own dev team, who really does need to be able to understand, then you need to give them more detailed information.
That’s what I’m going to be talking about today is the larger, more detailed process, not the, I just go open GitHub issues and tell you to fix something, and you do it without asking questions kind of thing. Of course, we always have that kickoff call where we confirm the scope and standard, what pages are going to be tested or what components are going to be tested and what version and level of WCAG, and do we need to do any testing beyond our standard screen reader process that we do. Then we’ll assign testing tasks. I assume that we can test between one and three pages per day, depending upon the complexity.
That really has to do with how long are they? How many sections? How many crazy different components are on a page? Then you know how long it’s going to take you. A long form homepage where you also have to do the header and footer because you haven’t done it yet, is probably a minimum of three. It could be four hours, depending on how complex it is. Then interior pages are shorter because you typically don’t retest all of the navigation and all of the footer. Then we do automated and manual testing by an accessibility specialist. Our first screen reader test is always NVDA and Windows because that is the most common desktop screen reader for users.
All of our reported issues are automatically piped into a Google sheet, which we’ll look at in a minute. Then we do a round of QA in the audit and some VoiceOver testing on things that we want to confirm or just double-check and see how they are different. Different screen readers interact with things different ways. It is really important to at least cover both Windows and Mac environments. Don’t just do one over the other. I know a lot of us developers, and even I, I am on a Mac right now, but I have an extra Windows computer. It’s super old.
I just pull it out when I want to test something on NVDA. It’s not my daily computer, but it is really important because NVDA is most used desktop screen reader, and it will read things differently from VoiceOver. You want to not miss something that’s going to be really common for a lot of users, so you got to do both. Then, we deliver our report, and we usually have one or multiple phone calls to talk through the audit with folks.
>> PAOLA GONZALEZ: Amber, I have a few questions. Mark asks, “Do you price by the page or by the day?”
>> AMBER HINDS: My partner Chris does all of our pricing, and what he does is, it’s more like page or component-level pricing. He has a whole page, a partial page, and a component or variation price. That’s how he does it. He has anticipated number of hours. When he hands off a contract to us, he’ll say, “This is the scope that I’ve worked out with the customer, and these are how many hours I expect it to take. Then, of course, us on the delivery end have to make sure that we stay in those hours or come back to him. If we’re looking at it from a technical standpoint, we’re like, “This doesn’t seem like it’s going to fit, but that’s how we price.”
>> PAOLA GONZALEZ: Also, John asks, “It seems to me that this is more for agencies who create sites for their customers. Is this required for personal websites?”
>> AMBER HINDS: If we’re talking about accessibility, accessibility should be on all websites in an ideal world. Legally, whether or not a personal website has to be made accessible, typically, the answer is no. The laws apply to business websites or government websites, or nonprofit websites. They don’t apply to my personal blog with pictures of my children on it. That said, the process that I’m going to talk about and showing testing, you can do on any website. I would encourage you to make your personal website as accessible as possible.
>> PAOLA GONZALEZ: Okay. Yvonne asks, “To understand users’ accessibility needs, what are the common methods to find out? User surveys, user testing, et cetera?”
>> AMBER HINDS: Related to figuring out what you need, I would say user surveys would be helpful. Generally, I would say if you are working either in an organization or with an organization that serves a specific population, they typically know what kind of users they have in their population. If you are working on any government, whether that’s a public library website, which is technically state, local government level or a federal website, then you can also just look at general population data for that area to get an idea. If you’re working on your city’s website and have to go there to pay their trash or their water bill, then you need to have the most thorough testing because you need to assume that anyone on any type of assistive technology could be needing to access that website.
I would say if you’re not sure who your audience is, then sending out a survey, hopefully you have some sort of email list or social media following, and that would probably be the best way to find out.
>> PAOLA GONZALEZ: Okay. I do have one more question about audit, and then two quick questions about the checklist.
>> AMBER HINDS: Okay.
>> PAOLA GONZALEZ: “Do you see AI doing some of the items in your audit? If yes, what percentage?”
>> AMBER HINDS: I mentioned here automated testing. Automated testing can be done with existing tools, some of which may or may not use AI. I’m always a little cautious about asking. I pay for a couple of different AIs and use them on the code standpoint. I think AI, like CodeRabbit in particular, has been really helpful at code reviews and flagging actual accessibility problems if you’re doing code. I’m not certain that AI does as good of a job at finding accessibility problems on rendered web pages in the same way. That’s when you start to get into the territory of, can AI also fix it with the overlays? I’d recommend looking at the overlay fact sheet to see what people think about that. Yes, I don’t know. There’s probably some percentage that AI can find, but it’s maybe 20% or 30%.
>> PAOLA GONZALEZ: Yes. Then two quick questions about the checklist. “Is there an option to check not applicable if any of the criterion is not applicable?”
>> AMBER HINDS: I did not build that in because for us, the checklist is not reporting problems. We report problems in a different way. The checklist is just saying, I checked this. If I looked at it and I determined it was not applicable, then I check it off, which is to confirm I looked at this check and confirmed it didn’t apply. You can totally modify that. I will say the build checklist process, it’s JavaScript in the Apps Scripts. I can’t remember where that is, but if you want to modify how that functions, if you go under the extensions, Apps Scripts, it should open for you.
This is my code that builds out the sheet. You could probably modify it to add a not applicable checkbox if you wanted to. AI could probably help you with that.
>> PAOLA GONZALEZ: Last question for now. “Is it okay to link to this from my portfolio when I have my audit process page updated?”
>> AMBER HINDS: If you’re talking about linking to the sheet, we would definitely appreciate if you’re planning to share the sheet as part of your process, that you would link to our webpage for it and give us credit for that. You’re free to use this for personal use. If you want to make a copy, and then share, and be like, “Hey, I checked all these things off,” with your clients or with your boss, that’s totally fine. If you’re promoting it on your website, please link back to our website and don’t say that you invented this checklist.
>> PAOLA GONZALEZ: That’s it for the questions for now.
>> AMBER HINDS: Okay, perfect. High level, how do we test? Obviously, towards the end, I said I’m going to actually demo this, so it’ll be a lot more thorough, but I want to just give this baseline of how we do it. One, we start by running automated bold scanning tool because this saves you a ton of time. I have a screenshot of our accessibility checker sidebar, which just got updated and exists in our plugin now as of yesterday. If you’re WordPress, you can use our accessibility checker. If it’s not WordPress, then you could use the WAVE browser extension or the axe browser extension, which I have in the slides in just a little bit.
If you’ve accessed them, you’ll have links to those, but some sort of automated tool is very helpful for finding obvious failures very quickly, like empty links, those sorts of things. Then we manually test a represented sample of every type. This would be like the homepage in WordPress, any sort of archives or single, so like your blog and an individual blog post, your team grid page, and then an individual team profile page, that sort of thing. Then any pages that have special features. I also would look at, from a priority standpoint, maybe going bottom of funnel up.
If you have a checkout page, do that before your cart page, before your product page. If you have a page where people submit a contact form that’s really important to you getting leads, then test that page. That sort of thing, bottom of funnel up. When we’re testing, we take multiple passes through the same page. The first one is with keyboard only. Second is with a screen reader. The third is with reduced motion turned on on our operating system. Then we zoom to 200%, and we zoom to 400%. There’s a couple of other little browser tools for text spacing that I’ll show that we use as well on the page.
Then, of course, even better, bring in screen reader users or other users with disabilities that use the specific technology that you need to do. I know this was super fast, but I’m going to show you all this in a minute, so I’m going to keep going for now. I have the screen up with some helpful tools that are in the slide, links to Accessibility Checker, WAVE, axe, some browser extensions that you’ll see later that I love. HeadingsMap, which has both Chrome and Firefox. Landmark Navigation has both Chrome and Firefox. The Text Spacing is a bookmarklet.
There is also a Chrome extension, WCAG 2.1 Accessibility 1.4 Text and Contrast, and then it has a whole bunch of other things added to it, that does something similar. Then there’s a Focus Indicator Chrome extension and Colorblindly Chrome extension. Colorblindly helps you if you want to simulate different levels of color blindness. I am actually going to jump over and show the Focus Indicator Chrome extension for a second. I’m going to show one other thing, which is how to track element focus in Chrome. Let me jump to a website for a second.
I have, this is just a fake website. I installed this news magazine WP theme that’s free on wordpress.org. It has 7,000 websites that use it. It looked like it had quite a few things that would be helpful for me. I broke it only because I needed to be able to demo something. You’ll notice if I tab through this website, there’s no focus outlines. You can’t see where I am. This is really common and super sucky, and it makes it really hard to test. This is where that Focus Indicator plugin comes in. Basically, when you have that installed, it will open the browser extension, and you could just click Add Current Site.
You’ve tested, you go there, you’re like, “There’s no focus indicators,” and you log an issue. Then, what I do is I go add the site to the list in my Focus Indicator settings. I leave it in whitelist mode, where it’s only going to work on the websites I’ve defined it on. You could switch it to blacklist where it would put one on every website. If you do that, then you might miss failures where the website doesn’t have one. I just keep it where it only puts it where I’ve told it to put it. Now, when I tab, I get a focus indicator, which is very helpful for further testing when you don’t have the ability to just fix the site right away because it’s not your site.
That’s what that browser extension is. The other thing that is really helpful is being able to track element focus in Chrome DevTools. How you do this, I’ll show you in just a minute, is you open DevTools, you go to the Console tab, you click the Create Live Expression button, which looks like an eyeball, and you type document.activeElement, all lowercase except for the E. It’s capital E. Then you click outside the Live Expression UI to save. If I do that on this same website, I’m just going to right-click, hit Inspect Anywhere to open DevTools, go to the Console tab, click my Live Expression button, put in there.
Now, if I click outside, I can see where my keyboard focus is as I’m tabbing. Right now I’m on the social Twitter icon. Even if I didn’t have my outline enabled, I would be able to see that. I recommend turning this on even on websites that have browser focus because occasionally you encounter elements where something that’s hidden gets focused, and you can’t see it. Everything else is fine, but you do that. This is how it can help you figure out what is the hidden element that is receiving focus. It’s interesting, too, here, you’ll notice if I tab, I’m on my Search icon and I’ve got div.newssx-search-icon.
Then I hit Tab again, and it looks like it’s on the same element, but now it’s span.newssx-svd-icon.search-icon. There’s two tab stops on this one element, and this is very helpful for you being able to see that. This is the other, it’s not really a tool, but little tip I have for finding these things. Before we come back to this website, I’m going to undo what I did. Let’s see. We’re going to remove that, and I’m going to go unbreak our website for one second here, only because let’s be fair to them when I’m testing later. All right. How do we report issues?
When we are delivering issues in this case, where it is a full report, we’re giving them Google Sheets reports, I have a list on the slide of all of these titles so you can see them later. I’m not sharing this example that I’m about to show you only because it’s not sufficiently scrubbed. The part I scrubbed that I’m showing you right now, you can’t really tell who it’s from, but you might be able to if you were to see this full thing. I’m not going to share this full example audit. Basically, what we do is we actually use a table in Google Sheets because that allows us to do a lot of custom views, which are really helpful for making sure that you can look at the sheet in different ways without messing other people’s view of the sheet up, which is really nice.
Basically, we have an issue ID, a title for the issue, and I’ll circle back to that in just a minute, the URL where the issue was found, the component or page that it’s in, what the affected element was. We have an image, which is on Google Drive, and it could be open separately, or you can just see a preview of it if you hover over the link. Relevant code snippets, a description of the issue, what are recommended fixes, the success criterion it fails, which version it fails, which level it fails, how severe we think the issue is, so high, medium, low, critical, whatever you want to put there.
Impacted populations, the date we identified it. We give them a GitHub issue column. A lot of times, they might change this to Jira or Linear, any of those other things. Retest status, which is a dropdown in the sheet which has options like not ready, waiting on vendor, ready for retest, retest scheduled, verified fixed, partially fixed, not fixed, not reproducible, not applicable, and client not fixing. This is how we track things if they’re coming back to have us retest, or if we’re going to be creating an accessibility conformance report, and we need to track process following the audit.
Then, retest notes we’ll use, for example, if we say something was not fixed or if it was only partially fixed, then we’ll add notes for them. Why do we give people a sheet? We’ve debated this so many times, but the bottom line is that what we’ve gotten feedback from with developers is that they don’t want a separate accessibility portal to log into to manage their issues, because they want their issues to go wherever they already do their development. The nice thing about a sheet is that they can then export this as a CSV and very easily import these all as GitHub issues, Jira issues, Linear issues, whatever platform they use for project management.
It’s really easy for them. That is a big thing that we’ve talked to a lot of people. They’re like, “We don’t want to have to have accessibility issues here and that.” Then, if they grant us access for the retesting, sometimes they do, they’re like, “We’re going to add you to our Linear.” Then, from there, we never track progress in the sheet ever again, except for our own purposes. A lot of times, they’re like, “Okay, we’re not going to add you to our Jira. That costs seats and all this stuff.” They’ll use it to do all of their dev in theirs. Then they just come back here, and they just say to us, “Okay, ready for retest.”
They have a batch, and then they tell us. We still use this as a project management tool, but in reality, their devs really want the issues where the code lives, not somewhere else. That’s what our reports look like. As I mentioned, all of these columns are listed out. If you wanted to create your own spreadsheet with that similar report setup, you can. The next question is, how do you get consistent, scalable reports? A few years ago, I’m going to say 2021, 2022 was when we started working with outside testers. Right now, our core team is me and Maria, who’s spoken at some of our meetups.
She is our full-time accessibility specialist. We also sometimes have contractors if we need somebody that’s using a specific assistive technology that we don’t have, or if we just need to scale up because our demand is higher, and we want to bring someone in. A problem that I realized back then was it’s the same issue. Images have empty alternative text, but somebody would say empty alternative text as the title, and somebody else would say images without alternative text, and somebody else would say images empty alternative text. The title was slightly different, the description of the problem was slightly different, the recommended fix was slightly different based on people.
If you want to be able to deliver consistent reports by multiple people, you have to have a process for standardizing those. What we did was we came up with our audit library. I built this over a weekend because we had for a time just said, “Okay, let’s just have a spreadsheet where we have all of our issues in our spreadsheet.” Even that was difficult and slowed people down. I realized, no, it needs to be more. It needs to be a database. I said, “How can I build a website that is very low code that allows us to store our canned issues and provides a form that makes it faster to report problems with those canned issues, but tweak them if we need to, so that it’s relevant to the specific problem and not too generic, and then also would connect over to the sheet and the Google Drive?”
This is what I ended up building. Basically, I took a website, and I have several different custom post types in it. What you’re looking at right now is our success criteria custom post type. This has, the title of each post is the Success Criteria. There’s taxonomies for the guideline and the impact population, the levels, the principles, the rules and the WCAG version. Then it has post-meta for the how-to-meet link, the understanding link, the WCAG link, all of that kind of stuff. All of this, I just did with Advanced Custom Fields Pro. I think around the time that I did this was around the time that they added the ability to create custom post types.
I used to have to code these. I was like, “Oh, I don’t even have to code these. I could just create the post type, create the taxonomy, and create the meta all with ACF.” That required literally no coding. I created that custom post type. Then we have a references custom post type, which the title is the name of the resource. Then it has, let’s see, a source taxonomy so that we can connect them together. A rules taxonomy, which I think is not being shown on the screen, but it has meta for the link. Examples of what we keep in here, there’s the very top one is sufficient techniques for error prevention, which comes from the W3C.
I can see it’s missing its source. It’s not connected to one, but you can see other things. We can see there’s also a field reference by where we can see what issue is referencing this specific resource, because in our recommendations on how to fix, we’ll sometimes say, “Go check out this document.” In something like, there’s an issue with the heartbeat API, “Okay, here’s the reference on wordpress.org for the heartbeat API.” We don’t have to look those up every time, and it can just fill in the references on the specific rule. We have that post type.
Then the biggest post type is our issues post type. You can see we have some pending because we have a whole process for adding these, which I will come back to in just a second. Here’s an example of a individual issue if we’re looking at it in the WordPress editor. This one is called Grouped form fields missing fieldset. It has an element type, so this applies to forms, the forms component. It has impacted populations. We can give them tags. I don’t think, yes, this one doesn’t have any tags applied. Then the rule is related to accessibility checker rules because we’re in the process right now of mapping some of these, because, in the future, sneak peek, we’re going to put some manual logging and some of our issue library into accessibility checker.
It’s not publicly available right now, but it will be in the future if you’re using our accessibility checker plugin. We have a default severity, although we always allow this to be changed on, even if you use a canned issue, you still have to define a severity just because something by default, we might think is high, in other scenarios, you’re like, “Eh, this component is really not super important to the user flow, so maybe it’s actually just a medium issue.” That kind of thing. Then we have descriptions of issues, related success criteria. This is where we connect it to our success criteria, what our recommended fix is.
We’re in the process, right now, of, we had them for WordPress, and we’re actually building out, this one doesn’t have one filled in, but for HTML. I’ll show you why in a minute, but that’s so that we can be even better and move faster, where, if an audit form is tagged as this is a WordPress website, then it will automatically spit out the WordPress fix. If it’s not a WordPress website, then it would spit out the HTML fix because we can’t tell them, “Go install this plugin.” This one doesn’t have a plugin recommendation, but there are some where we’re like, “You should switch to this plugin, which will be better,” which is the WordPress fix.
You can’t tell that to somebody who doesn’t have a WordPress website. Then we can see references. This is what we were talking about. Here’s the fieldset recommendation or documentation if somebody needs that, and then it would pull that in. This is what it looks like on the backend. Then, what I did was we have individual forms. We have one template, and we use Gravity Forms for this. We use a couple of Gravity Forms add-ons, but the most useful one that we use is a third-party one from Gravity Wiz called Gravity Perks, is what it used to be, populate anything.
What we do is we have, you have to put the URL where the issue was found. I’ll just stick one in there. What’s the component or page name? Select WCAG Success Criterion. In order to do this, we didn’t want to provide, here’s a giant dropdown with every possible error. We wanted to filter it a little bit so it’s easier. I will note, in this particular view, I’m using the searchable Gravity Form field, which is not accessible. If we have a blind person submitting this form, I turn off the search feature, and it’s just a normal select dropdown. I do think Gravity Forms is working on that, but just a note, if you’re looking at that and wondering.
Basically, we said, “How can we filter what the issue titles are so that’s a little bit easier?” Basically, you have to select the success criterion. Then once you do that, you say, “Is this an issue from the issue library?” If it is, then you can select the issue. I’ve chosen 1.1.1, non-text content, and I can see that the issues that are available to me are ready from our library, our alt attribute missing for profile image, alt text incorrect, alt text incorrectly applied to decorative image, alt text missing on non-decorative image, alt text needs improvement for profile pictures, alt text on linked image doesn’t describe links purpose.
A bunch of different rules that only apply to that success criterion. That makes it a little bit easier. Let’s say I’m testing, and I don’t like this. I’m like, “Oh, the problem I have isn’t listed here.” Then I click No, it’s not, and my Select An Issue goes away. I can then write a title, and the whole rest of the form is blank. Then, at the very bottom, there’s a checkbox that says Save to the Issue Library. We have the Gravity Form advanced post creation add-on installed. What that does is it puts it in the issue library, and it marks it as pending. Then we have a regular process where we go through those pending ones, and we check them and then publish them, and make them available.
Let’s go back and pretend like we are– Oh, wait, we’re going to say yes, it’s an issue from the library, and the alt text is incorrect, maybe. I’ve selected that issue. Now, I would put in my code snippet. I would name the element. Probably I’d put in a name of the image in that case. We require at least one image to be uploaded for every issue. I have four different upload fields here instead of one upload field that could accept four images. This is largely because of the issues I found with trying to get them to go over to Google Drive and show up in my spreadsheet.
I ended up figuring out that I needed to do it all with Zapier, the Google Drive Gravity Forms. There’s no official add-on for that. All the third-party add-ons I tried were super janky and did not work, and/or they couldn’t support shared drives, which is where all of our client files which are like all this weirdness. That is why, if you’re wondering, why are there four different upload fields? It’s because this is what I needed to do to make it work with Zapier. You are required to upload at least one image. Then you’ll notice it’s already filled in for me a user-friendly description, a recommended fix, and then impacted populations.
I don’t ever have to type them. Then I can choose the severity. I can edit any of these if I want. It won’t edit the issue that it pulled the data from, but it will edit it for this particular client. Then we also just have a little checkbox at the bottom, which is this issue needs discussion during weekly standups. If there’s something that’s like, hey, I’m not sure about this, or I flagged this, but maybe I shouldn’t, or hey, there’s some other thing we need to talk about, then that also flags for us on our sheet. When we’re having our regular standups, we’ll just go look for those and talk about them.
Just a little internal process thing that is super helpful. I can show you on the backend, this form has quite a few hidden things. It has a hidden field for embedded post title, the audit type, WordPress website, non-WordPress website software, and that would be selected. That’s where the conditional logic will come in on which recommended fix it will serve. The embedded page URL, that just helps us. Really all it does is it automatically fills in the URL where the form exists, but it’s just an extra way for me of tracking where it is, what page it is on for the client.
Then you can see this is an example of a populate anything, if you’re not familiar with this, on this select WCAG success criterion. Basically, with that add-on installed, I can say the type is post, I’m choosing a post, post type is success criterion. Then I want to show the post title, order by post title ascending, and the value I want to actually serve as the post ID, but I want the label, the visible text that people see, to be the title of the post. Then we use that in this select issue, where it then filters. The post type is an issue, and the related success criterion contains the post ID, which pulls, I’ve got a few, they made this selection, and then it passes the ID into this hidden field for WCAG success criterion.
Then this select issue filters by that. It took a while for me to figure this out, but it is actually super cool and handy. Then, once you do that, even these fields, the description of issue is similar, where if it will fill in– I’ve got logic on post type is issue, and it has to be published, and the post title is select the issue. This one just matches off the post title. Then it will fill in the description of issue meta field into this field. That is our form that I built. Then I don’t have a good Zap to show you without revealing client stuff. I’m going to try and make this a little bigger, and hopefully, we look at it.
Basically, what happens is we have the website open, we have the audit form open, and we’re finding issues. We log them in the form. Then, in Zapier, I built out this trigger, which I will try and describe. When a form is submitted in Gravity Forms, it then splits into paths. The paths are literally because of the images. This is the only way I could figure out how to do it without it erroring. There are four paths because we have a potential of you can upload up to four images on one issue. If you need more images than that, then my answer is you need multiple issues because probably you’re trying to group things too much, and you’re not being concrete enough.
Then what it does, it goes on path A. Path conditions is just is upload image one filled in? Yes. Oops, sorry. Then it will continue. Then we format the image extension, which is really, we have to figure out what kind of image it is, like PNG, JPEG, or whatever, because I figured out uploading to Google Drive, you have to tell it what you want to give it, otherwise it will break. It does that, and it pulls it out of the Gravity Forms info. Then it uploads the file. I set this to a specific Google Drive folder for that specific client and that specific audit. It actually changes the name of the image to match the Gravity Forms entry ID, and then Dash 1, Dash 2, Dash 3, Dash 4, based on what upload field it was put in, which is very helpful because then it does not matter what your image names are.
You don’t have to change it from screenshot, date and time, or whatever. It’ll just automatically do it, and then it helps us keep images connected if we need to say, “Hey, did something break or something weird?” Then, if we see them in that Google Drive folder, we can. Then it goes and creates a spreadsheet row and fills it all in. Then, path B, C and D are pretty much the same, which is, it says, “Does an additional image exist? If yes, figure out what the image extension is.” If no, it wouldn’t continue. Then, once you figure out the image extension, it uploads the file.
Then it has a Google Sheets app where it goes and looks up the spreadsheet row using the Gravity Forms entry ID, which is in our issue ID. We change those usually before we deliver them, but that’s how it starts out. It finds the row, and then it goes in that specific sheet to the row. I don’t know if I have one that has multiple on this, but let’s see. No, I can’t find one quickly, but it would go look it up, and then it would just add another URL in this exact same field. It just edits that row and adds it. It repeats through for as many images as they are.
This is a way that we have figured out to significantly improve our consistency and our speed because you don’t have to write explanations every time. Super helpful. I know I’m flying through this, but I want to get to, I have a list of plugins that are on this site only because I know people are going to want to know that. I’m not going to read them all out. They’re on the slides. It was 99% all off-the-shelf plugins, some of which are pro, but not much custom. The only custom plugins I ended up adding was I had to code a custom plugin to add admin columns on my issues that show some of the WCAG levels and things, querying off the WCAG post type that’s connected to.
I had to do that because that meta isn’t served on the post, so admin columns couldn’t handle that. I did that. I created a form editor user role so that somebody could access Gravity Forms, but not actually be an administrator on our website. Then I have a totally separate, but semi-related plugin that I made, which allows me to take a table from a Google Doc when we’re doing a VPAT to create an accessibility conformance report. I can export it as HTML, copy the HTML, which is really janky from that Google Doc export, and then put it into this field.
I could maybe show you guys. I don’t have an example of one where I can show you, but it’s really basic. It’s basically, I paste in this horrible, bad table HTML that Google spits out, and it turns it into a properly formatted with rows and column header table in a WordPress table block. You see you can just paste it on a page, and that’s how people then can put those ACR tables that we work on in a Google Doc very easily onto their website without having to hand-code the table. Again, not necessarily required for the audit, but it was a problem I had to solve because people were asking us to make them these tables, and it was taking forever. I’ve talked to you about this whole process for an hour. In the next 30 minutes, what I want to do is actually show some testing. I am not going to log issues because I don’t want to waste time. What I want to do is I want to demo some of the things that I would do if I came to this website. I’m actually going to go ahead and log out and just show you if I were hired to test this website, what would I do? Again, we could use– we’d have this checklist. I’m actually going to pull it over here. The first thing I would do is I would go through that checklist, and I would figure out what are all the things that I need to be testing for. Obviously, whole page because this is a whole page. I’m not only doing part of it.
Across the top, I can see there’s an animation, so I’m going to need to check that animation. There’s also a dark mode, light mode toggle. I probably need toggle buttons as a component that I would select. Going down here. I don’t know why they have a naked man reading an article. Sorry, guys, this is just like a fun Easter egg in here. There’s tabs. I’m going to need to have a tab component. I don’t see any accordions. I don’t see any pagination. Basically, I go through and I select all of those items on this page, and then that way I build my checklist to start. Then I’ll have my checklist open on another browser to keep track of what I’m doing.
If I start with the whole page, which if you’re looking at my sheet and you’re on the tab, you can see I stuck a whole page in there. I’m going to first look at that. You can check title just by viewing the tab. This does have a title, and it’s probably right if we’re pretending that’s a name. I would say, okay, that’s a pass. Page language, I’m going to do that by just right-clicking inspect the page, and I can see <html lang=”en-US”>, so it’s giving me an English language, so that’s a pass. We just keep going down through the checklist. I don’t see any other content in other languages anywhere on this page, so I don’t need to worry about content in different languages.
The next thing on my checklist– Actually, wait a minute, let me see if I can– I’m going to try to make these go side-by-side so you guys can see both. The next thing would be a mechanism available to bypass repeated blocks. Again, if you aren’t sure what these means, then you could be like, okay, this is a bypass blocks success criterion. Part of why we have these here also is if this fails and I have to go report it, you notice on my form, I have to first choose the success criterion in order to get the issue. That’s why that’s there. You could also go over to the WCAG quick reference and figure that out.
For me, I’m going to first check for skip links, and I’m going to do that by hitting tab on the page. I might not have had my focus at the top of this page, but all right. There is a skip to content link. That is present. I need to make sure it works. What I’m going to do is I’m going to hit return, and it visually scrolled me down. Now I’m hoping that if I hit the tab key again, I’m going to be on the first post here and not still up in the navigation. I’ll hit tab. I was somewhere, I’m not sure. Second tab got me here. Again, this is a little bit, “Huh, where did it send me? What was that first tab?”
This is where that document active element is helpful. Let’s go back to our skip link. Skip to content, return. Now I’m on the body, which makes sense. I would pass that. It has a skip link. It moves you– I’m on a grid image, and now I’m on a link. I’m guessing that there’s probably nested links somewhere here and the image, because it has this zoom effect. I bet you the focus outline is cut off. That’s not an issue related to bypass blocks, but that is something that I’d remember.
I’m realizing now something I forgot to tell you all, which is that when I start testing a webpage, I always record when I’m testing. On a Mac, I just do Command+Shift+5, which I could probably even do during zoom. I don’t think I’ll start it, but this will pop up a window that allows me to record. You’ll notice I have my entire screen recorded. In my options, I turn on the MacBook Pro microphone, which means that it will record my voiceover, all of that kind of stuff.
In VDA also, if on Windows, you want to have a way to record your desktop, and I will record for the entire thing. I, typically, don’t find an issue and then go report it. Like that one, I just saw one, and I said, “Oh, there’s a weird link here that is hidden that gets focused, and I can’t see the focus.” That is a failure that I know I’m going to have to flag later. I have found from a speed perspective that if I go through and I find all the things, and– because I’ve done this for a while, then I can remember. Then what I’ll do is I’ll go open the video, and I can drag through the video to the point, take a screenshot out of the video, which will include whatever the screen reader said.
I’ll say like in VDA especially, and VoiceOver, it can be really difficult to capture what the screen reader said in a screenshot, because while you have it turned on, it tries to help you when you’re taking a screen capture. It’ll read what you’re doing with the screen capture. It doesn’t understand, “Ignore this.” I will always take those screenshots from a video. I’ll just start recording, and I’ll record the whole time. It might take me only 15 or 20 minutes to get through everything I need to do on a page. Then that whole, when I was saying one to four hours, that’s actually logging the issues and taking the screenshots and going back through the videos to give some context.
Mechanism for bypass blocks, I tested. Feel free if there’s any questions to pop in, otherwise I’m going to keep going on this page for just a little while, and then I’ll stop for some questions in the end. Landmark regions– and there’s a whole other section for landmarks, too, that is a lot more detailed. I’m going to jump through a few of these because I think the checklist has a lot of detailed explanations, but I just want to show you all some specific things. I feel like I could spend an hour just talking about everything here. I changed my mind about putting that side by side, sorry.
Landmark regions, that’s where I like to use this landmark region browser extension that I already discussed. When I open this, you can see we have a banner nested inside the banner is a navigation search, a complementary, another navigation. Then there’s a main, which has a complementary. Then there’s content information, which is the same as a footer, and it has complementary, complementary, complementary. It is a failure if you have multiple landmarks of the same thing with no labels. These multiple navigations are failures. I think multiple complementaries are failures. They need to have accessible names that help people distinguish them.
I don’t actually know that I think all of these should be complementary. They’re just columns. I don’t think they need to be landmark regions in the footer, so I would probably flag this as an improper use of landmark. The other thing that I check for is I want to make sure there’s no content that’s not in the landmark region. This is helpful because it puts a pink highlight, so I can see there’s my banner, here’s my main. Let me go all the way down and check. Everything’s in the main. Then here’s a footer. They’ve done pretty well. I totally expected the scrolly thing up at the top to not be in the banner, but they’ve done a good job on that.
They do have a main tag. You always want to look for a main. It’s a failure if a page doesn’t have a main, but they don’t have to have a content information or a banner because if you get to some landing page that doesn’t have a footer or doesn’t even have a header, which we see sometimes on sales landing pages, that is not a failure. There are definitely some other issues that I would flag here with that.
The headings map plugin I mentioned. This is my favorite because it really helps us see all of the headings on the page. WordPress has tried to build some of this in the editor, but it only works with core headings, which is super annoying and not very useful. I super like the headings map plugin. Right away, you can see there’s no H1, which it’s bad for accessibility, bad for SEO. They don’t have to be visible. There could be an H1 here that’s the name of the website, and it’s screen reader only. That would help both accessibility and SEO.
Then we’re starting at a heading three about me. I don’t even know where that is, actually. That’s super weird. Social icons have a heading, I guess. Oh, wait, maybe that social icons heading is this. I don’t even know. You can see the heading levels skip around a little bit. I’d flag that. I would also check to make sure they are the same, or sorry, that they are nested appropriately. Sometimes you won’t get a red mark, but something will actually look wrong. For example, business is a three and it’s not getting flagged because it’s under this heading two. The browser extension can’t tell that there’s something wrong, but this heading two is the pros and cons of switching to a fully digital payment wallet.
Business is not a sub item of that. In reality, there should be some heading up at the top, even if it is a screen reader-only heading that’s featured articles. Then all of these, instead of being H2s, should probably be H3s. Then category list should be an H2. Automobiles, business, fashion, gadgets, these should be H3s. Then business should be an H2. Then all these articles, which are H3s, are correct. You can’t only look at, what are the things that’s highlighting red? You have to logically think about the page. This is where it’s like, could AI help? I don’t know. Sometimes it can, but sometimes I think it also doesn’t understand the logic of that kind of thing. That is something I would flag with headings.
I want to show you all a couple of things with a screen reader on. I’m going to turn on VoiceOver for just a minute, which you can do by hitting function. I don’t know why I turned that on. Function command, F5.
>> PAOLA GONZALEZ: Oh, Amber, we can’t hear this reader.
>> AMBER HINDS: You can’t? Okay, wait a minute.
>> SCREEN READER: Zoom share toolbar. Grid view, grid view. You have started screen share. Zoom us has new window. Zoom us has new window.
>> AMBER HINDS: Can you hear it now?
>> PAOLA GONZALEZ: Yes.
>> AMBER HINDS: Okay. Just so everybody knows, don’t type in the chat or my screen reader will read it out because I think I forgot to turn that off. We’ll circle back to this weird scrolly thing up at the top and some issues that I see with it. What I’m most interested in is this toggle button that I think for the color contrast would be interesting to go look at. I’m just going to tap until I get to that toggle button.
>> SCREEN READER: Audio submenu. Mute, stop, share, dock to top, button, menu, hide, web, remote, annotate, layout, pod, multiple, share, chat, chat, participants, button, group. Hide the participants list. Command U. You are Brave. News magazine, visited link, visited link, visited link, group, banner. You are currently on an image. To begin interacting with the contents of this image, press control, option, shift, down arrow.
>> AMBER HINDS: You’ll notice my virtual cursor when I hit tab went to the toggle button. There is a tool tip that appeared, switched to dark, but all VoiceOver told me was you are currently on an image.
>> SCREEN READER: Link, random post. You are currently on a link. To click this link, press control, option, space, group. You are currently on an image. To begin interacting with the contents of this image, press control, option, shift, down arrow.
>> AMBER HINDS: Obviously, this should be coded as a button. It should be coded as a toggle button. On our checklist for toggle buttons, you can see some of the expectation. It would need like ARIA pressed, and it would probably need a label that says dark mode. When dark mode is on, press would be true. When dark mode is off, it would not. There is another thing that you would look at. Look at our testing checklist for content that’s visible on hover.
>> SCREEN READER: Visited link image. News. Visited link. News. Content image.
>> AMBER HINDS: There are requirements that there’s a success criterion called content on hover, which requires that any content that becomes visible on hover has to be able to be dismissed without moving the mouse. I’m going to hit the escape key, and it did not go away. That fails content on hover. The other thing that it has to be able to be done is you have to be able to mouse over all of the content in the tooltip. Let me do that real quick.
>> SCREEN READER: Visited link image. News.
>> AMBER HINDS: You’ll notice when I tried to mouse over it, it went away. Why is that? It’s because people who have low vision, some people use magnifiers that are– they don’t magnify the whole screen, but they’re tied to the pointer. They need to be able to move the pointer over text in order to make it larger to read. This failed content on hover in two ways. Then, of course, this specific toggle didn’t work. Let me see. It should be a button, which means I should be able to trigger it with the space bar. It did work with the space bar, which is great, but you’ll notice while the page visually changed, it didn’t say anything to me. That’s that whole– it’s missing ARIA pressed.
I will do a lot of, I’ll go through a page top to bottom, and I’ll try and look for all of the focus states. I’ll try to reach all of the interactive buttons and controls and play with them and with the screen reader on, too. If you just did this with a keyboard, you would maybe think it works because you’re able to use the space bar, but turning the screen reader on is what tells you– I love how I get these weird reactions on my video. It tells you what someone is actually hearing, which is really important.
Another thing that is worth us looking at in these few minutes. Let me go back to this nav menu.
>> SCREEN READER: Link, random post, link, visit us, list link, about theme, visited link, support, visited link, Dribble 3,520, complementary. You are currently on a link. To click this link, press control, option, space.
>> AMBER HINDS: You’ll notice that I’ve lost my focus and the screen reader is reading out. I don’t know if you all can see this, but at the very bottom left corner, there’s a little focus outline. Let me shift tab again.
>> SCREEN READER: Visited link, Vimeo 1,254. You are currently on a link. To click this link, press control, option, space.
>> AMBER HINDS: What I think this is, and I’m going to turn the screen reader off, is inside here, Dribble, Vimeo. What they have not done, while they visually hidden the elements, they’ve not made them not reachable for keyboard users. That’s where I think before when I was just tabbing, I probably would have found this even without the screen reader because I can get to the menu button to open and close that. Now suddenly I have multiple tab stops, and I’m like, “Where am I?” Oh, I’m in here. That would be a failure, obviously. You should not be able to reach any content that’s not in focus. Let me turn this back on.
>> SCREEN READER: VoiceOver on Brave, News Magazine WP Theme, Brave, window, image. You are currently on an image. To begin interacting with the contents of this image, group, complementary, group, banner. You are currently on an image. To begin interacting with the–
>> AMBER HINDS: This is the same problem. It doesn’t announce as a button. I don’t know if this is a menu or open sidebar, whatever you would name it. It doesn’t tell me that it has a pop-up. I think is how that should function. Let me see if I can trigger it with my space bar. It opened. It doesn’t look like it shifted my focus into the modal. The screen reader did not say anything. Now, if I hit tab.
>> SCREEN READER: Group, complementary. You are currently on an image. To begin interacting with the contents of the–
>> AMBER HINDS: Tabbing did get me into it, but it should have given me focus. I would look at– on this, I would do everything on the checklist related to modals. My expectation is this should be coded as a dialogue. It should have an accessible name. It should receive focus when it opens. The button, you’ll notice, same problem. It’s an image. Didn’t say close modal, close sidebar, whatever we want to call it. That is, obviously, a problem. The other thing is I’m going to just tab through this real quick.
>> SCREEN READER: Visited link, visited, visited, visited, visited, visited, visited, visited, visited link. Dribble 3,000, visited link. Support, list link, documentation, list three items, link, video tutorials.
>> AMBER HINDS: You’ll notice that I was able to leave it without closing it. Now if I’m like, “Oh, hey, how do I get rid of that?” I press escape. Obviously, it’s not going to work because I’m not in it. With something like this, where it comes out and it covers other content–
>> SCREEN READER: Link, visited link, support, list three items. You are currently on a link. To click this link–
>> AMBER HINDS: This support link–
>> SCREEN READER: From James Monroe to everyone. This demo is a great example of why people should move away from classic themes they find online and use build block themes that can use FSE and core blocks and take advantage of all the hard work the WP accessibility team has done the last few years.
>> AMBER HINDS: Sorry, guys, I can’t make the chat not talk. Give me a minute and then you can write in the chat. This is also a failure. This is a new 2.2, which is that things that receive focus should not be covered by any user-generated content, which this would be the user added it. Sticky nav menus, sidebars that slide out like this. Now, the solution for this is you should not allow someone to leave the sidebar without closing it, but you can see there’s something back here that got focus. Now, let me go back.
>> SCREEN READER: Visited link, Dribble 3,500.
>> AMBER HINDS: All right. I’m in it. Now I’m going to hit the escape key and see if it closes. It doesn’t, which is pretty annoying. I’d have to go back up to the X. Let’s do that.
>> SCREEN READER: Complementary. You are currently on an image. To begin interacting with the contents of this–
>> AMBER HINDS: I closed it, but you’ll notice it didn’t move my focus back. There’s this little square up in the header that still exists there. Where it should have put me was on that button for opening it. If I hit tab, right now I’m still inside of it. Look at the checklist for everything related to modals because all of those things probably apply. What I’ll do is I’ll go through, I’ll record, I’ll have all these screen reader things so I can take screenshots.
Then when I’m actually reporting is when I’ll start inspecting, and I’ll say things like, “Okay, this is a div.” They’ve given a tab index, which is good, but I’m going to say either use a button or add a role of button in my recommendation for them. I would give them this whole thing, and I would flag that it doesn’t have an accessible name. Then for the modal, same thing. I’ll open, I’ll inspect. They just have it as an aside, but it really needs to be a dialogue because it does cover other content.
The movement up here, how I test that is in your system settings. You can do this on both Windows and Mac. It’s in different places, but generally under accessibility. If we go to display, then there’s a setting for reduced motion. When you toggle this on, you should not even have to refresh the page. A website that properly controls for reduced motion is going to stop animations. This particular animation across the top is going to fail because it doesn’t respect prefers reduced motion. It’s also going to fail pause, stop, hide, because it is an animation that plays for longer than five seconds and does not have any pause button. That right there would fail.
The other thing that I noticed on this when I was just tabbing, and I don’t know if you can see this at the bottom right now, it says, “The Secret Ingredient Top Chef Swear By,” that’s something that’s receiving focus, I think, that is in there. Oh wait, no. Where am I? Yes. You can focus elements here that you can’t see. That whole component would probably need to be completely rebuilt or removed.
I’m trying to think if there’s anything else on my– it’s super difficult. There’s so much on this particular theme. I honestly would say, and I feel slightly bad for the same developer, but also maybe not. If you wanted to practice testing, this would be a really great theme to practice on just because there is so much going on with it. We could listen to these tabs.
>> SCREEN READER: VoiceOver on Brave. News visited link. Visited, link. Dribble 3,520 link, comma, item, news, magazine, link, article. You are currently on a link. To click this link, press control, option, space.
>> AMBER HINDS: All right. You’ll notice my tab focus didn’t even go to the featured or popular. Let me see if I can reach it if I do it with arrow keys. If you can’t tab to it, that tells me it’s probably just a div. It’s not actually a functional component. I’m going to hold down caps lock because that’s my modifier and use my back arrow.
>> SCREEN READER: The rise of side hustles. How Gen Z is redefining work. Article, end of list. You are currently in a list.
>> AMBER HINDS: It just tells me I’m in a list.
>> SCREEN READER: You are currently on a selectable text.
>> AMBER HINDS: Selectable text.
>> SCREEN READER: You are currently on a selectable text.
>> AMBER HINDS: Let’s see if I hit the space bar. Nope, doesn’t do anything.
>> SCREEN READER: VoiceOver off.
>> AMBER HINDS: That right there, these are probably missing all the semantics that you would need. It’s just a list. It’s not tabs. It’s missing tab list roles, tab roles. These should have tab panel roles, all of that kind of thing. I wish I could spend time auditing a whole page, but there’s not quite enough time, and we’re almost nearing the end of time. I want to stop sharing. Paola, do you want to come on and maybe if there’s any final questions that I can answer about our process or testing or anything like that, I am happy to do that.
>> PAOLA GONZALEZ: Yes, we do have a few questions. Most of them are in the general aspect. One of them is, “Do you suggest using Brave as a WordPress developer? Why? I use Edge, by the way. Thanks.”
>> AMBER HINDS: Oh, do I suggest using Brave?
>> PAOLA GONZALEZ: Yes.
>> AMBER HINDS: Sorry, is that what they asked? Oh, I just like Brave because it blocks a lot of stuff. I do think for testing purposes, you should use Chrome. I forgot and I was thinking about switching. I use Brave also, but I will– Chrome is the most commonly used browser, and really when you’re testing, you want to try to use what is most commonly used. We’ll typically do Chrome NVA Windows, and then on Mac, VoiceOver Safari and VoiceOver. I’ll either do Brave or Chrome, depending upon what’s going on.
You have to be familiar with what Brave blocks, though, because if you’re not, then you might miss something. You definitely don’t want to be– if you’re on a website that has ads, you should test the accessibility of the ads, too. You might have to turn your shields off.
>> PAOLA GONZALEZ: Another question. How does your accessibility tester work with external engineering teams? Example, they report something that engineers can’t reproduce even with the same tools. Do y’all hop on a call and walk through it?
>> AMBER HINDS: Yes. Typically if someone can’t replicate, then the first thing I’ll do, or Maria will do, just to be fast, is we might do a screen recording and show, but we get on Zoom all the time. People that we do auditing with, we have calls built in at a regular Kadence. If they can’t replicate something, then we’ll get on a call and try and help them replicate it. Or, in some weird scenario, if we’re like, “Oh, maybe this is just us.”
>> PAOLA GONZALEZ: The next question. I heard about screen reader text functional flow tree. Did anyone build it, or have a template on functional flow tree for link buttons in a form to read out in sequence in screen reader after a link button click?
>> AMBER HINDS: Sorry, I am trying to absorb that question. I think that it’s– I don’t know of one specifically. I would check. Adrian Roselli has a lot of stuff on his website, and it’s possible that he has a flow map that says how things will read. If you’re specifically talking about the order of importance that is put on different types of ARIA for naming– and I can get Adrian’s website. I do know– could you grab a link to Maria’s ARIA talk, Paola, while I pull up Adrian’s website?
>> PAOLA GONZALEZ: Adrian’s in the chat. I did that one.
>> AMBER HINDS: Oh, perfect. You already did it. Okay. If you’re wondering about the order of ARIA label, ARIA labeled by, ARIA described, ARIA described by, and how a screen reader will take precedence, and I’m not sure if that’s what they’re asking, Maria did cover this in her ARIA talk. That might also apply to this question.
>> PAOLA GONZALEZ: Do you test increasing font size in the browser without zooming too?
>> AMBER HINDS: Oh, yes. Sorry, let me do that for one second. I was like, what are the top things I should touch on? I’m going to pull back over. Give me one second. There are a couple of things that I do. I’ve got my whole desktop shared. The text spacing bookmarklet is one that I mentioned. This is really helpful because you basically, the link is in the slides. If you just drag it to your bookmarks bar, it stays there, and then you can click it. That will apply the text spacing that is required. What you look for once you do this is make sure nothing is cut off, which typically happens if you have fixed heights. That’s how you check text spacing.
There is also this other browser extension that I linked, which has some text resizing with it that you can also use to test. It does the text spacing also, and it does reflow, but I don’t really like to use it for reflow. What I’ll do to check reflow is I inspect, and you need to drag your browser to 1,280 pixels wide. That’s a little weird. I’m like one pixel off. Then you have to be able to zoom up to 400%. I’ll usually go 200. Check this. If you had a new mobile, like this main menu now appeared, okay, well, now I got to test this whole component, which didn’t exist on desktop. I’ll check the whole page there, scroll down, look for new things to test, and then go up and zoom to 400%.
Then the other thing you can do in Firefox, this is the one thing that I’ll usually check in Firefox. If I pull Firefox over. Firefox has a setting where you can zoom text only, which I already have turned on, because that’s what I use to test here. When you do that, it doesn’t zoom the whole page. It just zooms the text. You would need to be able to– This, for example, right here would be a failure. By right here, what I’m talking about is a background image that has a set height and width, and it’s not conforming to the text because it’s trying to force a specific layout. When the text gets zoomed to a certain part, the title of the blog post is cut off because there’s not enough space.
That would be an example of a failure with zoom text. I usually test this one in Firefox because this is a setting that people use. I know someone came upon that on our website quite a few years ago, and we were like, “Oh yes, we need to fix that.” That should answer that question.
>> PAOLA GONZALEZ: We’re a little bit over time, but I do want to get through a few questions.
>> AMBER HINDS: I’ll try to go fast.
>> PAOLA GONZALEZ: One of them says, “I’m the only one auditing websites. I want to audit creative websites. I use a screen reader and keyboard. Do I need to create my own audit reports from scratch?”
>> AMBER HINDS: There are tools that you can use that will generate reports for you. I think for us, it was really just a matter of figuring out what is the information that we think people need and how do we want it formatted. You may or may not have to create your own. Obviously, I’ve given you what the columns are on what we report, and you can create your own Google Sheet in that way. There are other templates that are available that you might be able to use as well.
>> PAOLA GONZALEZ: Do you use a separate checklist for each page? Do you add separate lines for each component on a page? Say, there are two accordions on a page.
>> AMBER HINDS: We will group things by component. If there’s a stack of accordions, or even if there’s two accordions on the same page, but we can tell by inspecting the code that it’s the same kind of block or widget or whatever that’s just been used in two different places, then we would not create the same issue over and over in our reports because that’s just unnecessary noise. It just needs to be fixed one time.
If we inspect the code and the classes are totally different, we can tell that there’s two different sets of code that is creating the two different accordions, then even if they have the same problem, we will add them as different rows because it probably has to be fixed in two different places. Or, you fix it in one, and then you rebuild the bottom accordion with the one you fixed at the top, that kind of thing.
>> PAOLA GONZALEZ: Joe Simpson says, “Amber, thanks for the presentation. With your process, do you feel that you’ve developed your testing approach over time, learned it at school, or other? In recapping the session, what are foundations should viewers start with to build their testing process?”
>> AMBER HINDS: Yes, we’ve definitely developed our testing process over time. In particular, I would say, I was testing just by myself, and then it was really only four years ago that we started bringing in maybe other people to help with testing. There’s a whole learning curve there. This particular site that I built, I think the copyright on it is the footer copyright that I never updated, it says 2023 or something. There’s been times when we’re like, “Hey, we really need to fix this about our process,” but it’s a lot of while we’re doing.
It wasn’t necessarily like, “I built this whole giant process, and then I started auditing websites.” I was auditing, delivering, getting feedback from people on what they wanted in their reports. The whole adding a column for GitHub issues, the first reports, I never had that. Then we had enough people that were like, “We need to be able to track our issue IDs on these.” We always respond to feedback that we get.
I would say from a foundational standpoint, where to start, not to pitch myself that much, but our two courses on NVDA and VoiceOver, I, in those courses, talked– I showed specific components way more than I did here. There’s a 15-minute video on tabs, and another video on accordions, a video on carousels, a video on forms, very detailed with– It’s like how to use a screen reader, what keyboard shortcuts are, how to move around on a page, how to listen to the page, how to start it, stop it. Then I have all these different component examples where I listen to them, I listen to a bad example, I talk about what’s bad, and then I go listen to something that visually looks identical, but is good.
Learning to use a screen reader is really important. I would say those are good resources. There’s also other resources if you don’t want to purchase those courses. Then just spending time on WCAG. You have to learn it, unfortunately. I know some people are like, “I don’t want to do that.” Deque has some courses for learning WCAG that I think some folks have said are helpful. Making flashcards. I know it sounds like so old school, like I’m in high school or college, and I’m like, “Go make flashcards.” Some of it is just memorizing the rules and memorizing what some of the problems might be.
Obviously, you can find a problem, turn on a screen reader and go to that dark mode toggle and be like, “I’m switching it and it doesn’t say anything.” If you don’t know what is the fix, then it’s hard to deliver an audit report. You have to know, okay, I think this should be a button. It should sound like this. This is the ARIA that will make it do that, is really important. The other resource on that that I recommend is the Mozilla Developer Docs. They’re one of our top recommendations if you’re trying to learn ARIA and understand that.
That said, I don’t want to scare people away from testing because especially on your own site, your own site is a great place to learn. Start testing and you can start doing it and you will find problems. Even if you don’t totally know what the fix is, if you have a developer on your team, you can be like, “It’s not saying anything when I switch to dark mode,” and then they can help you figure it out. Just flagging the issue is a good start.
>> PAOLA GONZALEZ: This question came up. What page builder is your preferred one because it helps with accessibility and makes it easy to implement?
>> AMBER HINDS: I would say we tend to prefer Block Editor. Kadence is the one that did the best in our accessibility audits. I know Elementor has been putting a lot of work into accessibility, although I think their Ally plugin is a little suspicious. Don’t put an overlay or a little tool. You don’t need the accessibility toolbar. They’ve been doing a lot to try and fix issues, Elementor. I would say if I had to choose a page builder, it would probably be that one.
There are lots of page builders that you can build accessible websites in if you know what you’re doing. We’ve been remedying a Divi website, which anyone who’s familiar with page builders knows that Divi has horrible accessibility, horrible. We’re able to fix it, and we didn’t say you have to go rebuild your website. If you know what you’re doing and you test, you can really build an accessible website in anything.
>> PAOLA GONZALEZ: Amber has done a accessibility page builder report for the past two years. I pasted that in the chat so that you can have access to that information. Amber, do you see any other questions that you would like to get through before we wrap up?
>> AMBER HINDS: In two minutes? Quick one. Do both operating systems have preferred reduced motion? Yes. This exists on Windows also, so you can also turn this on. Can I show how you report an issue from the audit using the audit report and audit library? I don’t think I have time to do that right now. I didn’t set up a zap for my example form. I didn’t want to use a real form, obviously, because I don’t want to mess up someone else’s audit, but I could maybe make a little video of that that we can make as a short or something on our YouTube.
Then, what else? How do you test an iframe in any embedded interactive regions not accessible by region colors, specifically ARIA live regions or dynamic maps? This is a great question. You should generally be able to test an iframe on a page, except for the fact that your automated tools won’t work for things in an iframe. If you’re trying to use automated tools like Wave or Axe or the Headings Map plugin, I actually will inspect iframe source and get the source URL and try to open the iframe itself alone in its own browser tab. Then you can use some of your automated tools to test it.
There are some things that you can’t– we had someone come to us once and ask if we would audit– we do a lot of auditing outside of WordPress, and they had a web app that, it’s like a educational money game, but it’s an HTML canvas element. I took a few minutes of looking at it. What I told Chris when he was like, “Should we quote this?” As I said, the answer is no, because the whole thing is not accessible. Everything fills color contrast, nothing can be reached with the keyboard.
I was like, “They could pay us to tell them that every part of their thing is broken, or they could just go rebuild it.” We can tell them that right now for free. There are some things that are really difficult to test, and they’re really difficult to test because they literally don’t function, and they should just be rebuilt.
>> PAOLA GONZALEZ: We are running out of time with our captioner. I would like to wrap up today’s meetup. Amber, where can people find you?
>> AMBER HINDS: If you want to follow up, if you have additional questions, you can find me on Twitter/X, @heyamberhines. I’m also on LinkedIn. Our Facebook group is probably the best place. If you have additional questions, I will make sure to check in there today. I’m traveling tomorrow, but I have some time at the airport tomorrow, so I could answer some additional questions that we didn’t have time to get through if you post them in the Facebook group and that way everybody can get the answer.
>> PAOLA GONZALEZ: Yes, perfect. Well, thank you so much for the talk, Amber. We’ll see you guys on the next one.
>> AMBER HINDS: Yes. Bye.
>> [01:43:58] [END OF AUDIO]
About the Meetup
The WordPress Accessibility Meetup is a global group of WordPress developers, designers, and users interested in building more accessible websites. The meetup meets twice per month for presentations on a variety of topics related to making WordPress websites accessible to people of all abilities. Meetups take place on the first Thursday and third Tuesday of the month at 10:00 AM U.S. Central (5 PM CET).
Learn more about WordPress Accessibility Meetup.
Summarized Session Information
This session takes a behind-the-scenes look at how a real accessibility audit is performed, from defining scope and understanding WCAG, to testing with assistive technologies, to delivering actionable reports developers can actually use.
It breaks down WCAG’s structure, shows how to build consistent workflows with checklists and issue libraries, and demonstrates how manual testing uncovers issues automated tools miss. The result is a practical, repeatable approach to auditing that combines process, tools, and experience to identify and fix real accessibility barriers.
Session Outline
- Knowing What to Check
- Using Checklists for Consistency
- Audit Process & Workflow
- How Testing is Performed
- Tools & Practical Techniques
- Reporting & Deliverables
- Scaling Consistency with an Audit Library
- Key Learnings from the Live Demo
- Real-World Challenges & Collaboration
- Final Takeaways
Knowing What to Check
Before starting an audit, you need to clearly define what you are testing against. That includes:
- The WCAG version (typically the most current)
- The conformance level (AA vs AAA)
- Any additional standards (such as EN 301 549)
- The target audience and assistive technologies used
Different organizations have different expectations. Some want AAA issues included for visibility, even if they won’t fix them. Others prefer to focus strictly on AA to avoid noise.
The audience also matters more than people expect. If a site serves users who rely on specific tools, like JAWS, voice control, or alternative input devices,those need to be included in testing. If you don’t know your audience, you should assume a broad range of assistive technology use and test accordingly.
Breaking Down WCAG for Audits
Amber takes time to break down how WCAG is organized so auditors can actually use it, not just reference it. WCAG is structured in layers, and understanding those layers is key to knowing what you’re actually testing during an audit:
- Principles (top level): These are the broad categories, such as Perceivable, Operable, Understandable, and Robust. They describe the overall accessibility goals, but they are not testable. Think of them as the “why” behind everything.
- Guidelines (middle level): Under each principle are guidelines, such as Text Alternatives. These explain the intent of what needs to be achieved, but again, they are not directly testable. They act more like directional statements.
- Success Criteria (testable level): This is where actual auditing happens. Each success criterion (like 1.1.1 Non-text Content) includes specific, measurable requirements. For example, ensuring all non-text content has a meaningful text alternative. These are what determine whether something passes or fails.
Auditors should always anchor their work in success criteria, because those are the only parts of WCAG you can truly evaluate. But stopping there isn’t enough; you need to understand the intent behind them.
To do that, you should regularly use the supporting WCAG documentation:
- “Understanding” documents → provide deeper explanations, context, and real-world examples.
- “How to Meet” documents → outline practical techniques and implementation approaches.
These resources are especially helpful when something isn’t clearly a pass or fail. In those gray areas, even experienced auditors will go back and double-check the documentation. It’s not about memorizing WCAG, it’s about knowing how to interpret and apply it consistently, especially when you run into edge cases.
Using Checklists for Consistency
Even with a strong understanding of WCAG, audits can quickly become inconsistent without a structured approach. That’s where checklists come in.
A detailed checklist helps ensure that every required check is completed, especially across different components on a page. This includes:
- Whole-page checks (title, language, etc.)
- Navigation elements (menus, breadcrumbs)
- Interactive components (modals, search, tabs)
- Structural elements (headings, landmarks)
The checklist used in this process includes hundreds of checks and can be customized for each page being tested. By selecting only the components on a page, you create a focused checklist that ensures nothing is missed.
The purpose of the checklist is not to report issues, it’s to confirm that everything was reviewed. Whether something passes, fails, or doesn’t apply, the goal is consistency in coverage.
Audit Process & Workflow
A structured workflow makes audits predictable and scalable. The process typically follows these steps:
- Kickoff: Confirm scope, pages, and standards.
- Task assignment: Estimate time based on page complexity.
- Testing: Combine automated and manual methods.
- QA review: Validate findings across environments.
- Delivery: Provide detailed reports and walkthroughs.
Page complexity plays a big role in timing. A homepage with multiple components can take several hours, while interior pages are often faster since shared elements don’t need to be retested every time.
Testing is performed using both NVDA (Windows) and VoiceOver (Mac) to ensure coverage across environments. Different screen readers behave differently, so relying on just one can lead to missed issues. Not sure how to use a screen reader? Check out our online courses on screen reader testing or read on below.
How Testing is Performed
Testing is done in multiple passes, each focusing on a different interaction method:
- Automated scan → quickly identifies obvious issues (e.g., empty links).
- Keyboard-only navigation → tests focus order and interaction.
- Screen reader testing → validates announcements and semantics.
- Reduced motion → checks animation behavior.
- Zoom testing (200% and 400%) → evaluates layout and readability.
Pages are selected strategically. Instead of testing everything, the focus is on:
- Representative templates (home, archive, single pages).
- Key user flows (checkout, contact forms, conversions).
- Unique components not found elsewhere.
This approach ensures coverage without unnecessary duplication.
Tools & Practical Techniques
Tools support the process, but they don’t replace manual testing. Several browser extensions and techniques help surface issues more efficiently:
- Headings tools → reveal structure and hierarchy issues.
- Landmark tools → identify missing or duplicate regions.
- Focus indicator tools → visualize keyboard focus.
- Color and contrast tools → detect visual accessibility issues.
One particularly useful technique is tracking focus using browser DevTools:
- Use
document.activeElementto see what element currently has focus - This helps identify hidden focus states or unexpected tab behavior
These techniques are especially helpful when visual indicators are missing or when debugging complex interactions.
Reporting & Deliverables
All audit findings are documented in a structured Google Sheet. Each issue includes detailed information such as the affected URL, component, code snippets, screenshots, WCAG criteria, severity, and recommended fixes. This format is intentional, as it allows development teams to easily import issues into their existing tools like GitHub or Jira.
It’s also important to have clear, consistent language in reports. Developers need to understand not just what is wrong, but how to fix it and why it matters. The reporting system also includes tracking fields for retesting, allowing teams to monitor progress and verify fixes over time.
Scaling Consistency with an Audit Library
Consistency becomes a challenge when multiple auditors are involved. The same issue can be described in different ways, which creates confusion.
To solve this, a centralized issue library is used. This system:
- Stores standardized issue titles, descriptions, and fixes.
- Links issues to specific WCAG success criteria.
- Allows auditors to select predefined issues during testing.
When logging an issue, the system can automatically populate:
- The description
- The recommended fix
- The impacted users
Auditors can still edit the content, but the baseline remains consistent. This improves both speed and quality across audits.
Key Learnings from the Live Demo
In the live demo, Amber walks through a real webpage and demonstrates how she identifies accessibility issues in practice. She starts by reviewing the page structure, checking elements like the page title, language attributes, and skip links. From there, she evaluates landmarks and identifies problems such as multiple navigation regions without proper labeling.
She uses the headings tool to reveal issues like missing H1 headings and incorrect heading hierarchy, explaining that tools alone are not enough—testers must also evaluate whether the structure makes logical sense. With a screen reader, she demonstrates how interactive elements can fail to communicate their purpose, such as toggle buttons being announced as images instead of buttons.
She also highlights issues with tooltips that cannot be dismissed or accessed properly, modals that do not manage focus correctly, and hidden elements that remain keyboard accessible. Another key example is animations that do not respect reduced motion settings, as well as content that continues moving without providing a way to pause it. These examples reinforce how multiple WCAG criteria can fail within a single component.
Real-World Challenges & Collaboration
Amber discusses the realities of working with development teams, noting that issues are not always easily reproducible. In these cases, her team may provide screen recordings or join live calls to walk through the problem. This collaborative approach helps ensure that issues are understood and resolved correctly.
Automated tools are useful, but limited. They can catch obvious issues quickly, but they only cover a portion of accessibility problems.
AI and automation may help with code analysis or surface-level checks, but they cannot reliably evaluate real user experience or interaction patterns. A significant portion of accessibility testing still requires manual review and human judgment.
Final Takeaways
Accessibility auditing is a structured but highly human process. It requires a combination of technical knowledge, consistent workflows, and real-world testing with assistive technologies. Tools and checklists are essential, but they are only effective when paired with thoughtful analysis and experience. Over time, auditors develop the ability to quickly recognize patterns and issues, but that expertise is built through continuous practice and engagement with accessibility standards.